After the release of MCP servers for Autopsy (release blog) and Cyber Triage (release blog), we received requests for how to use only local LLMs instead of public servers. This blog post shows you how to use LM Studio to run local LLMs along with Cyber Triage and Autopsy.
This topic is also relevant for those who want to experiment with AI and enter the DFIR+AI Challenge: Good vs Ugly. This allows you to use your case data without sending data to remote sites.
LM Studio is a free tool that allows you to run local LLM models on your computer. It will download models, load them, and provide the chat interface to them. Thanks to Nanni on the Sleuth Kit Forum for highlighting this was so easy.
Why Use Local Models
The main reason that organizations use local LLMs are because either the lab is airgapped or because their policies prevent them from sending data to the cloud or vendor systems.
Using a local LLM means that everything can stay in your network.
But, local models have some downsides:
- They are small and therefore have less knowledge in them to enable enrichment of hashes, files, etc.
- They have less reasoning abilities
- They are SLOWER
But, all of those downsides could be better than no AI at all.
Setup
First, setup Autopsy and Cyber Triage MCP servers using their respective user manuals, but stop when you get to the step about installing Claude Desktop. I.e. enable it in the options panel.
Before you proceed, make sure you have the path that you got from the Cyber Triage or Autopsy options panel (such as c:\\Program Files\\Cyber Triage\\bin\\cybertriage-mcp-stdio.exe).
LM Studio Setup:
1. Download LM Studio
2. Install and launch it
3. Pick a model to download (we don’t yet have a strong opinion on which is best)
- Gemma 4 E4B is the default
- Qwen3.5 9B is also recommended if you have 16GB+ of RAM
4. Once the model has downloaded, open the chat window.
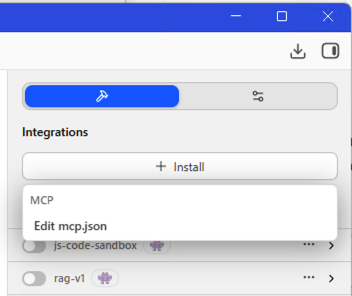
5. You should see a “+ Install” button on the right. Choose that and select “edit mcp.json”
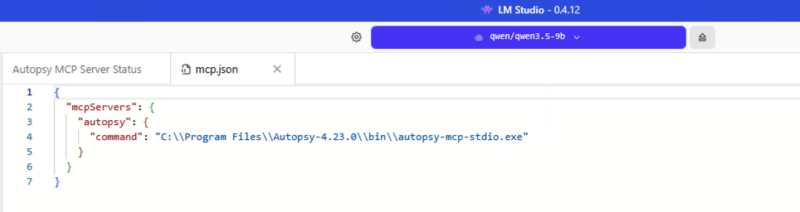
6. That will give you json to enter the path into. The end result should look something like this (for Autopsy):
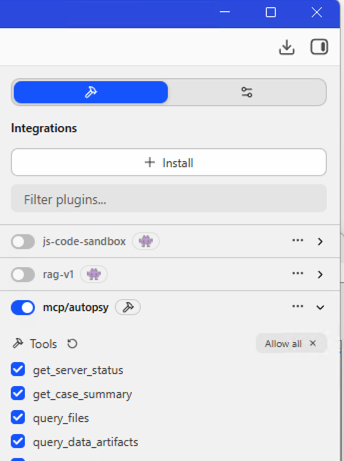
7. You can then enable the MCP on the right hand side.
That’s it. You can then start typing away. As always, we recommend your first prompt is something like “can you see the Cyber Triage MCP server?”
Results Compared to Claude
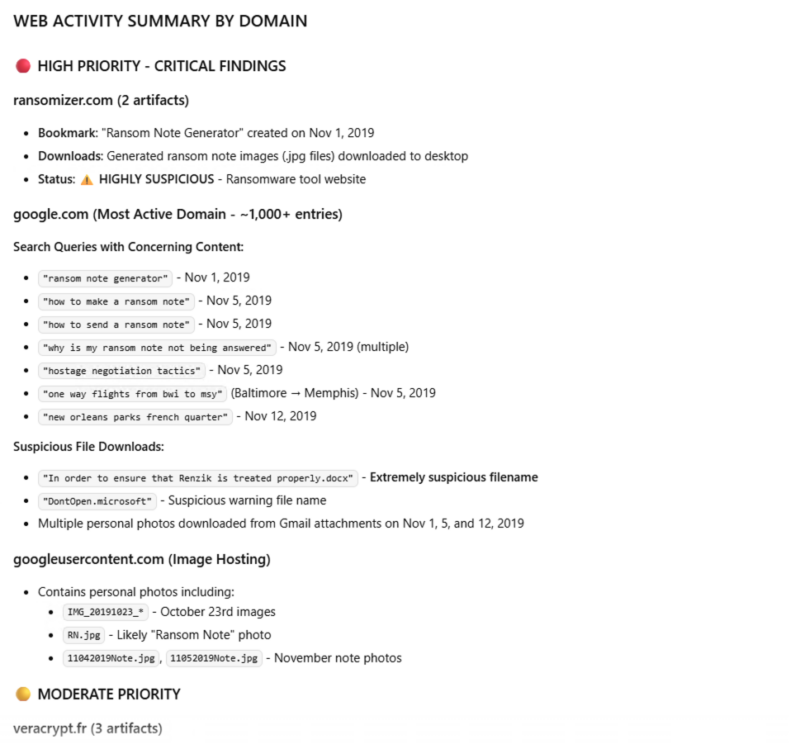
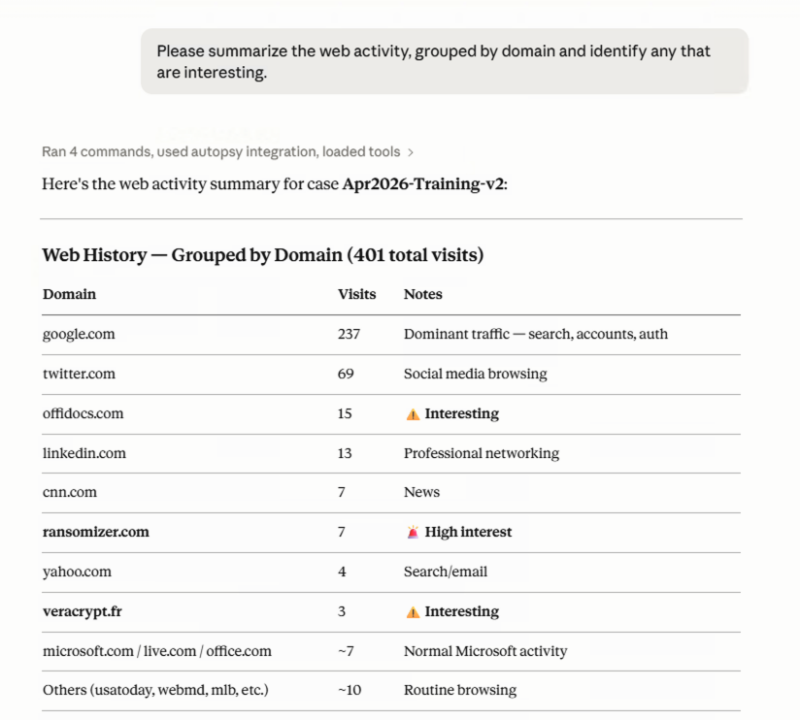
We used the Autopsy training image and issued the same prompt to both Claude Sonnet 4.6 and the local Qwen3.5-9b.
Prompt: “Please summarize the web activity, grouped by domain and identify any that are interesting.”
Gwin3.5-9b took over 25 MINUTES to respond (!) and gave these results:
Claude took around 30 seconds and this was the result.
Try it Out
If you can’t use public models, but want to experiment with AI try out these local models. Share your results on the forum! And submit your results to the challenge by May 25.