Cyber Triage version 3.2 brings in several customer requests. The whole list of new features is HERE, but today I’d like to introduce you to some of the most prominent ones. This post covers:
- Batching – You can now queue multiple hosts at a time for ingest.
- KAPE Input – You can now import data from a KAPE collection and have it be analyzed and scored.
- Simplified EDR Deployments – You can now more easily deploy the collection tool out via EDR to dozens of systems and the results will get queued up for analysis.
Along with the features listed above, we are also excited to announce a new version of Cyber Triage, called Standard Pro. Standard Pro is for users who will do many investigations per week, but want to stay in a desktop deployment model (versus a client-server setup). It has increased malware scan limits and includes the new file batching features. We’ll be adding many more features to it in the coming months.
You can download the latest release from here.
What Is Ingest Batching?
Batching allows a user to specify a set of JSON files, disk images, or memory images to be imported by Cyber Triage, rather than importing one at a time.
Batching allows you to import one or many JSONs without waiting for each one to finish before adding the next one.
This feature allows you to “set it and forget it” – the ingest will continue to process the files until they are completed.
Ingest Batching Example Use Cases
There are several use cases for this feature, but some of the most prominent ones we have heard from Cyber Triage customers are:
- A SOC that deploys the collection tool via an EDR to many computers, and the artifacts are written to a network share. The folder can then be imported and processed in one step.
- A consultant sends the collection tool to their client, who runs it on many hosts. The consultant can then import the files in one step after they are transferred.
Why Should You Care About Ingest Batching?
File batching has been one of the most requested customer features. Notably, one of the most important benefits of this feature is freeing up analyst time. File batching will save you from having to import potentially hundreds of files one at a time.
- Efficiency: You and your team can now focus on other relevant investigatory tasks while Cyber Triage works to prepare your collections for analysis.
- Risk Reduction: Manually ingesting files is more labor-intensive and more error-prone. Batching allows you to queue all the files at once, reducing the likelihood of error.
How To Use Ingest Batching
Batching is now available in the Standard Pro and Team versions of Cyber Triage. Customers who typically use the Standard version will need to upgrade to Standard Pro to utilize this feature. Standard Pro and Team also have increased malware scan limits, which are required to process large numbers of inputs.
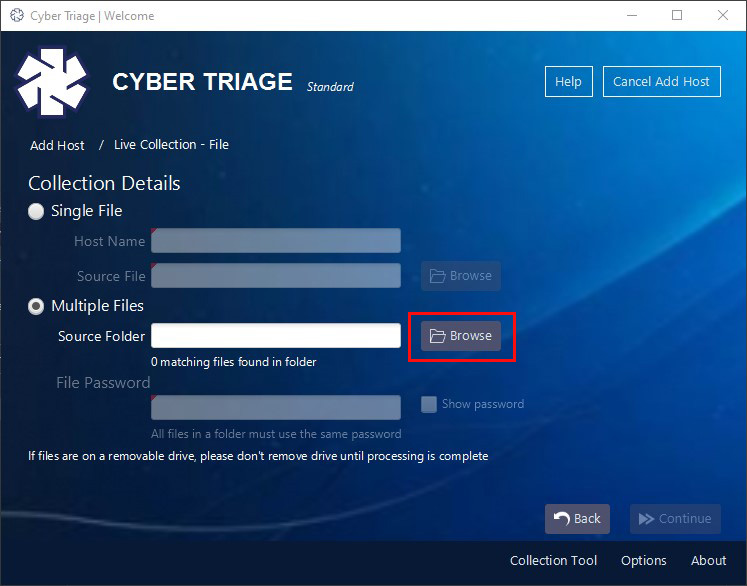
Once you collect the data using one of the various collection methods, you can ingest multiple files at once by choosing the “Live File” option on the Add Host screen after creating and naming your incident.

Then, it’s as easy as pointing Cyber Triage to a folder directory with your JSONs, and the new ingest, and scheduling functions will take care of the rest.
Note that the 3.2 release also changed how the collection tool saves its output. It is used to create special folders for each host. It puts the outputs into a single folder, and each file has a unique name. You can now import that entire folder without renaming it.
Once you choose your folder, all JSONs within that folder will be added to the ingest queue. You do not need to open the folder. Simply choose it.
Once you select the folder, the number of files found will be listed under the source folder path, like so:
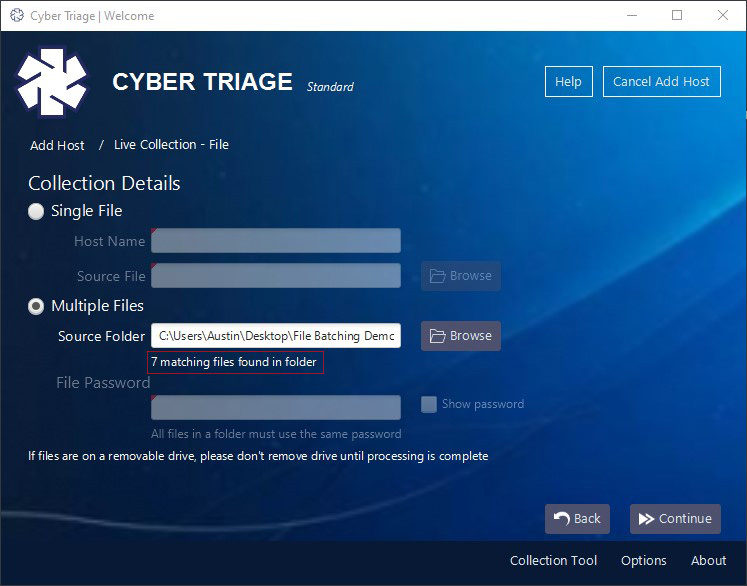
Press “Continue” in the bottom right corner, and the files will begin to process.
The first screen you see is a status screen with a collapsible status update panel. You don’t need to open this, but it’s there if you want to.
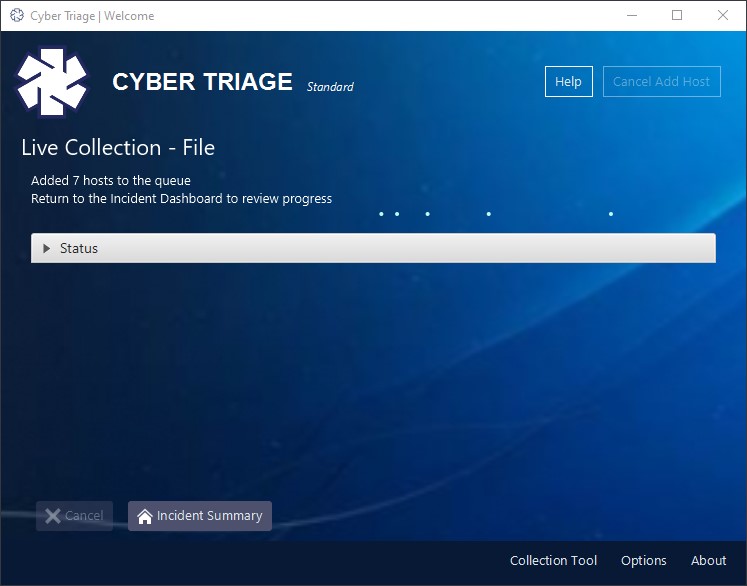
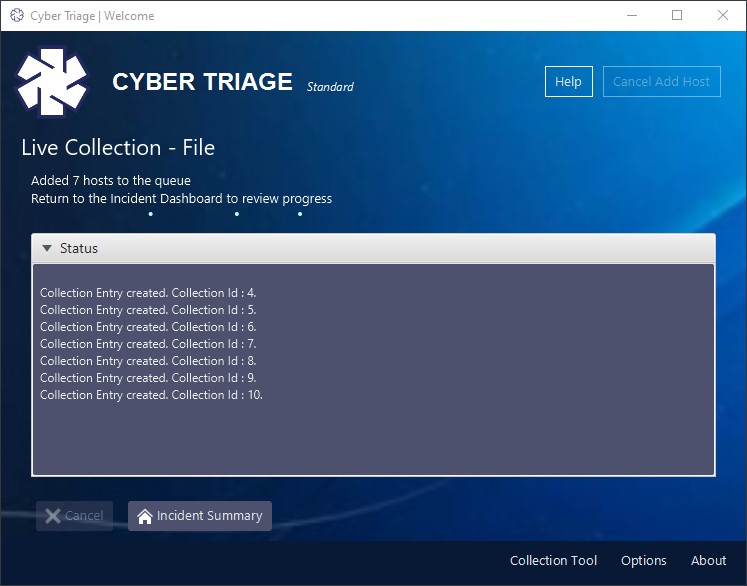
On this screen, choose “Incident Summary” to return to the incident summary panel and see all your host’s processing!
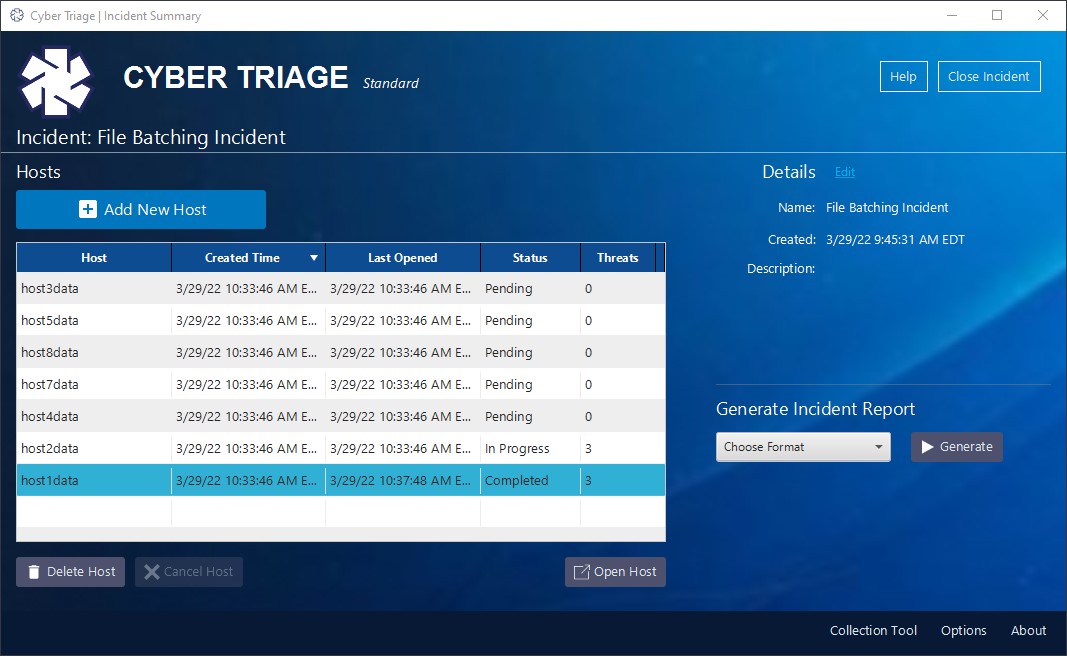
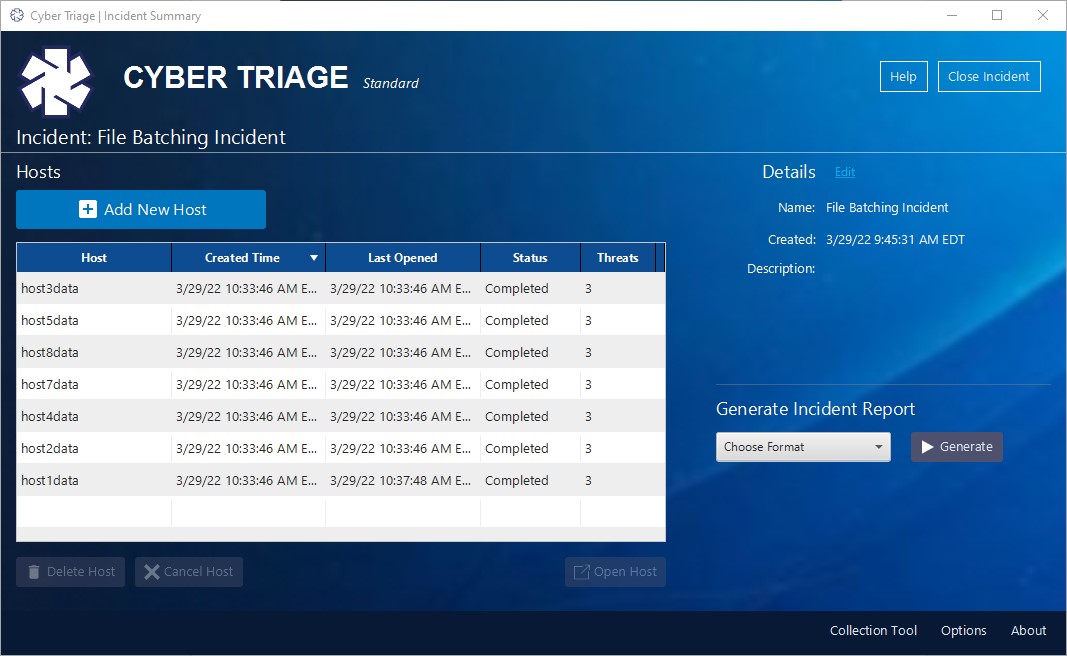
On this screen, you can see that a host is processing, and the others are queued for ingest.
Once the first host is completed, the next will start. You can open a “Completed” or “In Progress” host to begin your analysis while the other hosts continue to process. The process will continue until all of the host data has completed processing. The number of hosts that are processed at the same time will depend on your license.
That’s it! We hope you enjoy this exciting new feature and that it adds greater efficiency to your workflow process.
Simplified EDR Deployments With Cyber Triage
This new feature allows you to deploy the collection tool to dozens of hosts using IT infrastructure (such as PowerShell or EDR) and know that the data will get saved on the server.
In previous releases, the server would reject connections after a certain limit, and it was up to you to retry. Now, if the server is at processing capacity, it will save the incoming data to disk and schedule it for processing when there is capacity. This feature is only applicable to Cyber Triage Team deployments.
Note that the previously mentioned batching feature also uses this infrastructure, so you could see a combination of EDR-based collections and disk images in the same queue.
The ingest scheduler on the server is now smart enough to store collection information for future processing after collection from a host computer.
Example Use Cases Of EDR Deployments With Cyber Triage
This feature allows you to configure your IT infrastructure to deploy the collection tool, and you can then walk away without needing to worry about server capacity and scheduling retries.
Cyber Triage Team has long supported the ability to collect from a set of live hosts. But, some environments don’t support PsExec, which is what we use. In those environments, responders must deploy the collection tool using another form of infrastructure. Often they use:
- EDR that allows them to run arbitrary tools
- Some other IT infrastructure that allows them to remotely run program
How To Deploy Cyber Triage With Your EDR
There is no new setting for this feature, but to support deploying the collection tool via an EDR then, you need to enable collection tool-initiated sessions.
By default, Cyber Triage only accepts data if a responder initiated it from the UI. By enabling this feature, the server will accept any data as long as it has the correct server key.
If they have enabled a Collection Tool Initiated Session within the Cyber Triage Options panel, you can then configure the IT systems to run with a command such as this:
CyberTriageCLI --server cybertriage.acme.com --server-key=123456
KAPE Integration
Some of our customers already have a collection method they are happy with but are looking to add the scoring features of Cyber Triage. To enable them to continue using their existing methods, we’ve added support for KAPE.
You can now import a KAPE VHD file, and Cyber Triage knows how to find the relevant registry hives and event logs in the KAPE-specific naming conventions.
NOTE that other KAPE outputs (such as SysInternal outputs) are not currently being parsed.
KAPE and Cyber Triage Use Cases
If you are a KAPE user and have a workflow built on it, but are looking to get more analytics to help you know where to start your investigation, then this feature allows you to get that without changing how you collect.
In future releases, we’ll parse more of the outputs (and add other tools) to ensure you can take advantage of the Cyber Triage scoring even if you don’t use the Cyber Triage Collection Tool.
How To Use KAPE Integration
Importing and analyzing the KAPE output is virtually the same process as adding any other disk image.
The first step is to find your KAPE output, which should be a .vhd as pictured below:
![]()
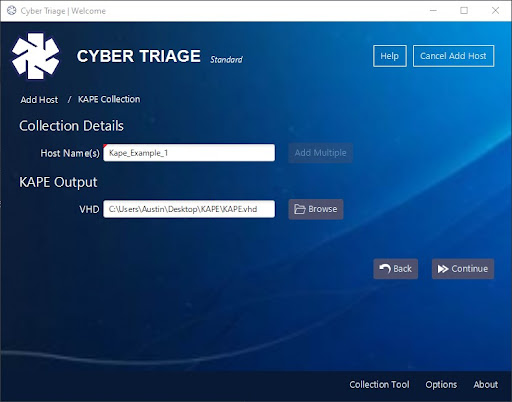
Next, you will want to import the .vhd into Cyber Triage by choosing the “ KAPE” button on the right-hand side of the Add Host screen.
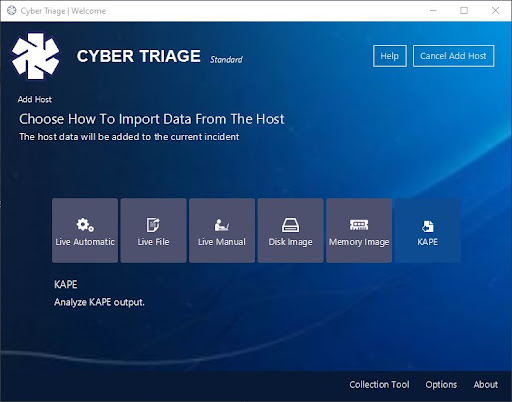
Next, you’ll give your host a name and then navigate via the “Browse” button to the KAPE .vhd. Once you have navigated to the page, press “Continue.”
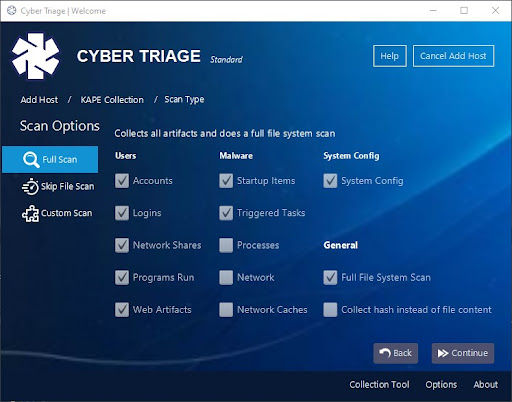
Now for the important part! On this screen, you want to decide which artifacts you want Cyber Triage to analyze and present the results for.
The three options are:
- Full Scan – Collect all of the artifacts and do a scan of all other files on the VHD to determine if they are suspicious.
- Skip File Scan – Collect all of the artifacts, but skip the file system scan. This has a bigger performance impact on a full disk image or live system than it will on a partial KAPE VHD.
- Custom Scan – you decide which artifacts to analyze by checking the boxes provided.
Once you’ve chosen which artifacts you would like to parse, you can then select if you would like to upload any file hashes to the Cyber Triage external file reputation services for malware scanning. Note that the KAPE VHD doesn’t often contain executables, so this setting may not be actually used.

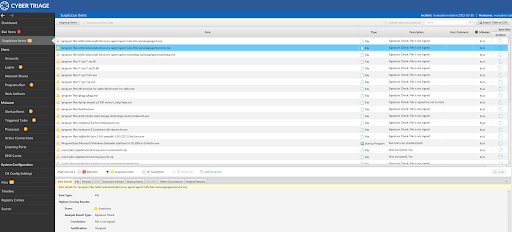
Once you start the collection, you will be brought to the Cyber Triage Dashboard to analyze the artifacts brought in by KAPE. You can then sort through the artifacts just as you would with a typical image/host.
And that’s it for 3.2!
We hope you enjoy this release. If there are any questions or you need assistance with any of these new features (or any questions at all), please reach out to support. You can download the release from here.