S3 buckets are an increasingly common way to get DFIR data from one site to another. Our latest Cyber Triage release allows you to use temporary credentials with an S3 bucket and this blog post covers how to use S3 and minimize the risk of credentials being discovered. This allows you to quickly and securely move data from a client or remote office.
You can get the latest version from here.
S3 Basics
Simple Storage Service (S3) was initially introduced by Amazon but is now available with other providers. The basic idea is that you can save and retrieve data (an object) based on its name. It’s like a file system, but there is not an inherent folder structure concept.
An S3 Bucket is equivalent to a network file share. It is a container with S3 objects, which are basically files. User accounts can be granted various levels of read and write permissions in a bucket.
You can access data in S3 via either a web interface or applications (such as Cyber Triage) can directly communicate with S3.
Using S3 for Incident Response
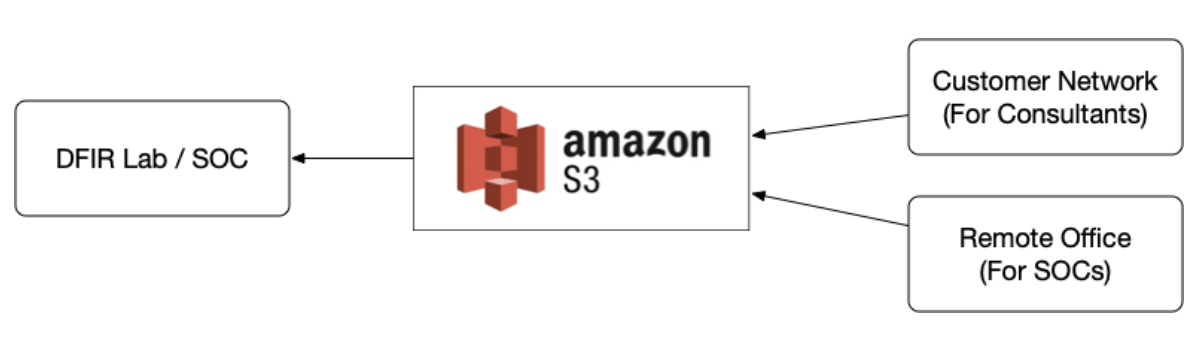
Incident responders can use S3 to get data between corporate offices or from a customer site to the consultant’s office. The basic concept is that artifacts are collected from a computer, uploaded to S3, and then downloaded from S3. S3 is the common storage between the two locations.
Securing S3 for DFIR
The main risk for using S3 is that attackers already in a compromised network can access the bucket or data will be later leaked. To prevent that, there are a few things to consider:
- Any data uploaded can be encrypted. S3 offers its own forms of encryption, but you can also make sure that any data uploaded has its own encryption to minimize the chances that someone can make sense of your data if they get access to it
- Contain each of your clients (if you are a consultant) with their own S3 bucket. You pay AWS for the storage, not the bucket itself. So, it should be possible to limit the scope of each bucket to a single client or remote office
- Lastly (and most importantly) minimize permissions that you give to collectors. You will be using S3 credentials on a potentially compromised computer. The key concepts here are:
- Grant it only write permissions. The collector needs to only upload data. They do not need to see what else is in there
- Limit the time it is valid. The collector only needs to upload data for a certain timeframe. If the credentials are compromised, they should not work forever.
AWS can generate temporary credentials that are good for up to 36 hours. If you want them to be active longer than that, you’ll need to manually restrict access.
This blog goes through how to create temporary credentials and configure them with Cyber Triage.
Cyber Triage Deployment Basics
Before we dive into details, let’s make sure we’re all on the same page with where Cyber Triage runs.
There are two programs that come with Cyber Triage:
- The Collection Tool runs on the suspect system and collects artifacts from the system
- The main Cyber Triage application runs on the examiner’s systems (or server) and imports the artifacts.
The artifacts from the collection tool can get into the Cyber Triage application directly over the network or via a JSON file. In the case of S3, the collection tool will save the artifacts to a JSON file and upload that to S3.
Configure AWS Account for Temporary Credentials
The first step is to get AWS users and buckets set up to use the temporary credentials. This is for AWS, but other providers may have a similar feature and process. You’ll need to do this only once per user.
There are two setup steps:
- Create a user account with multi-factor authentication enabled
- Create and configure the bucket to require multi-factor authentication.
Create a User with Multi-Factor Authentication
Use the Identity and Access Management (IAM) panel to create a user account that will be used for the upload. It will need S3 access and you need to enable Multi-Factor Authentication:
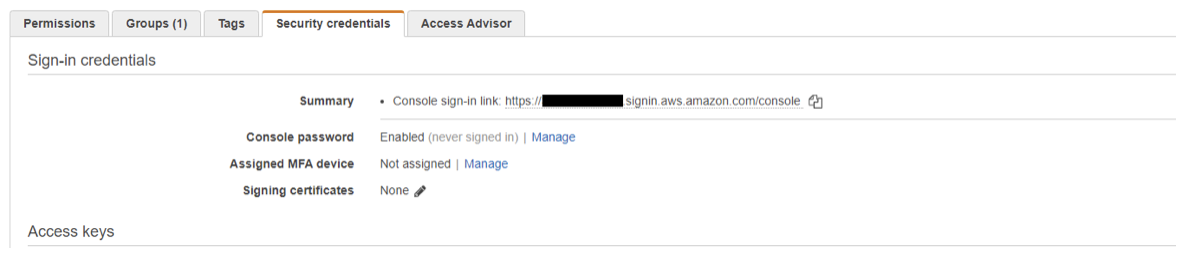
To configure MFA, press “Manage” and choose a “Virtual MFA” device. That will step you through a process of installing some form of an app to generate time-based tokens. You’ll need this to later generate temporary credentials.
Note that the person who will later be generating the temporary credentials needs access to the MFA device. So, if you will be generating them for your client or remote user, then you will need access to the MFA device.
Configure Bucket to Require MFA
By default, buckets will not require MFA, but we want that for the given user and bucket they should upload to. You can define this on the bucket or the user/group.
S3 and user policies can get complicated in different environments, but the basic idea is that you want to have something like this in the user’s policy (which could be part of a group):
{

“Effect”: “Allow”,

“Action”: “s3:PutObject”,

“Resource”: “arn:aws:s3:::BUCKET_NAME/*”,

“Condition”: {

“BookIfExists”: {

“aws:MultiFactorAuthPresent” : “true”

}

}

}
There are a variety of AWS documents out there on given bucket access to a specific user, such as this or this. Note that these documents will likely grant more read permissions than you’d like.
As you experiment with your S3 bucket policies make sure you do some tests to ensure you have not opened the bucket to the public.
Generate Temporary Credentials
The previous two steps need to occur at some point to create the user and bucket. They can be reused many times for many collections.
When an incident happens and you need to deploy the Cyber Triage collection tool, then you’ll need to:
- Generate temporary credentials
- Configure the Cyber Triage collection tool using those credentials.
To generate the temporary credentials, you need to download and install the AWS command-line tool. Run ‘aws configure’ to supply it with the user’s access key. You can get this information from AWS IAM:

Next, run ‘aws sts get-session-token’ to generate the temporary credentials.
- You’ll need to enter in the current MFA code from the Virtual MFA you configured
- You can use ‘–duration’ to specify how long the token is valid for.
For example, a 24-hour token would be generated such as:
aws sts get-session-token --serial-number arn:aws:iam::......:mfa/user --token-code MFA_TOKEN --duration 86400
This will produce JSON similar to:
{

“Credentials”: {

“AccessKeyId”: “ABCABCABCABC”,

“SecretAccessKey”: “abcdefghijklmnopqrstuvwxyz”,

“SessionToken” : “AReallyLongStringThatSpansSeveralLines”,

“Expiration” : 2021-03-01T12:00:00+00:00”

}

}
You will now use these three fields to do uploads.
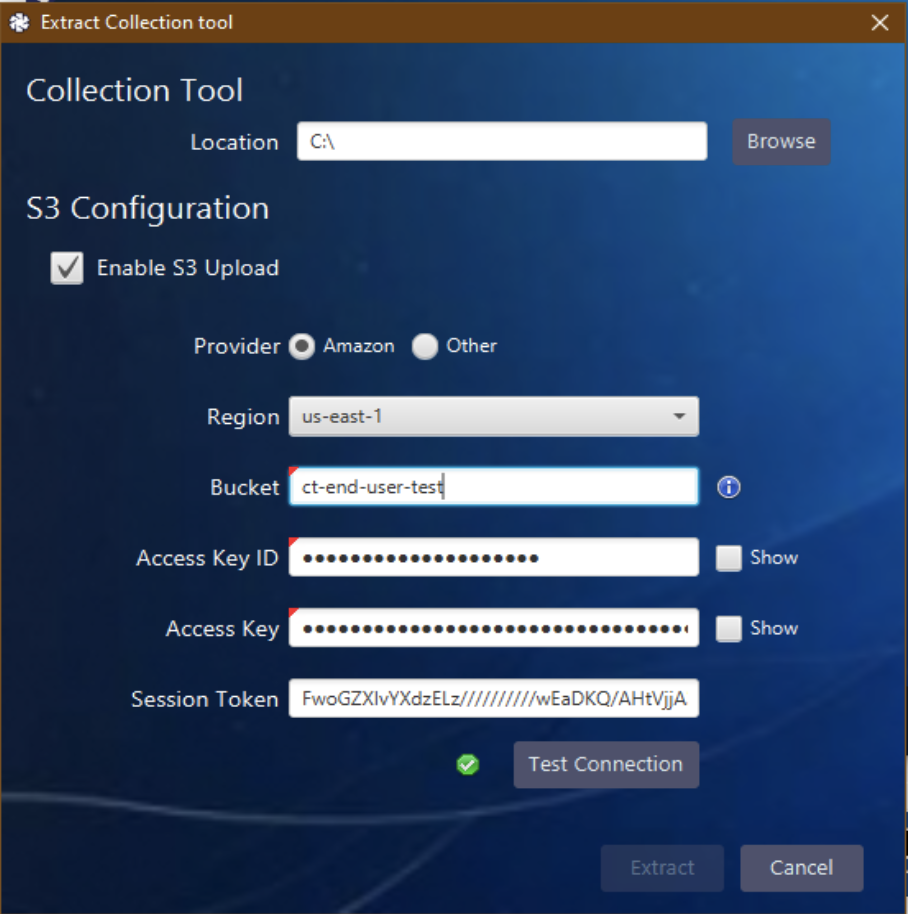
To configure the Cyber Triage collection tool, choose “Collection Tool” from the main part of Cyber Triage and choose “Enable S3 Upload.”
That will give you a set of boxes. Enter in the Access Key ID, Access Key, and Session Token using the data from the JSON output:
Once you press “Extract,” the S3 configuration data will be saved to the specified folder along with the collection tools:
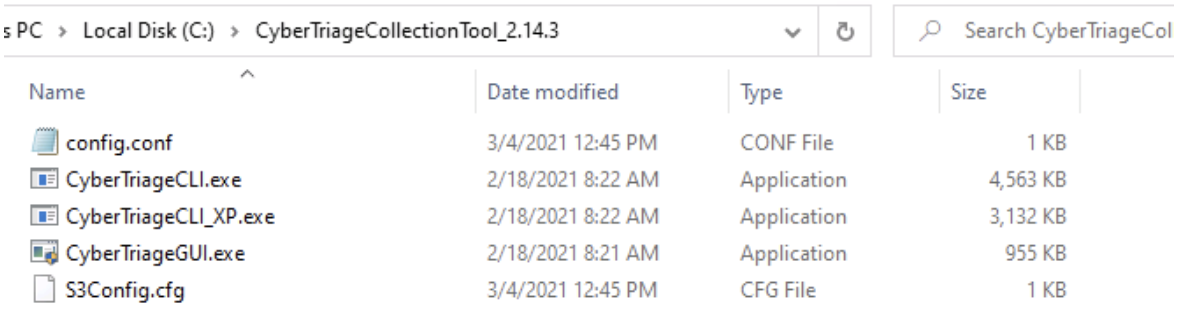
You can ZIP up this folder and send it securely to your client or whoever is going to do the collection.
Collecting and Uploading to S3
On the target system you want to collect artifacts from, you can then launch the CyberTriageGUI.exe program that was inside of the folder previously created:
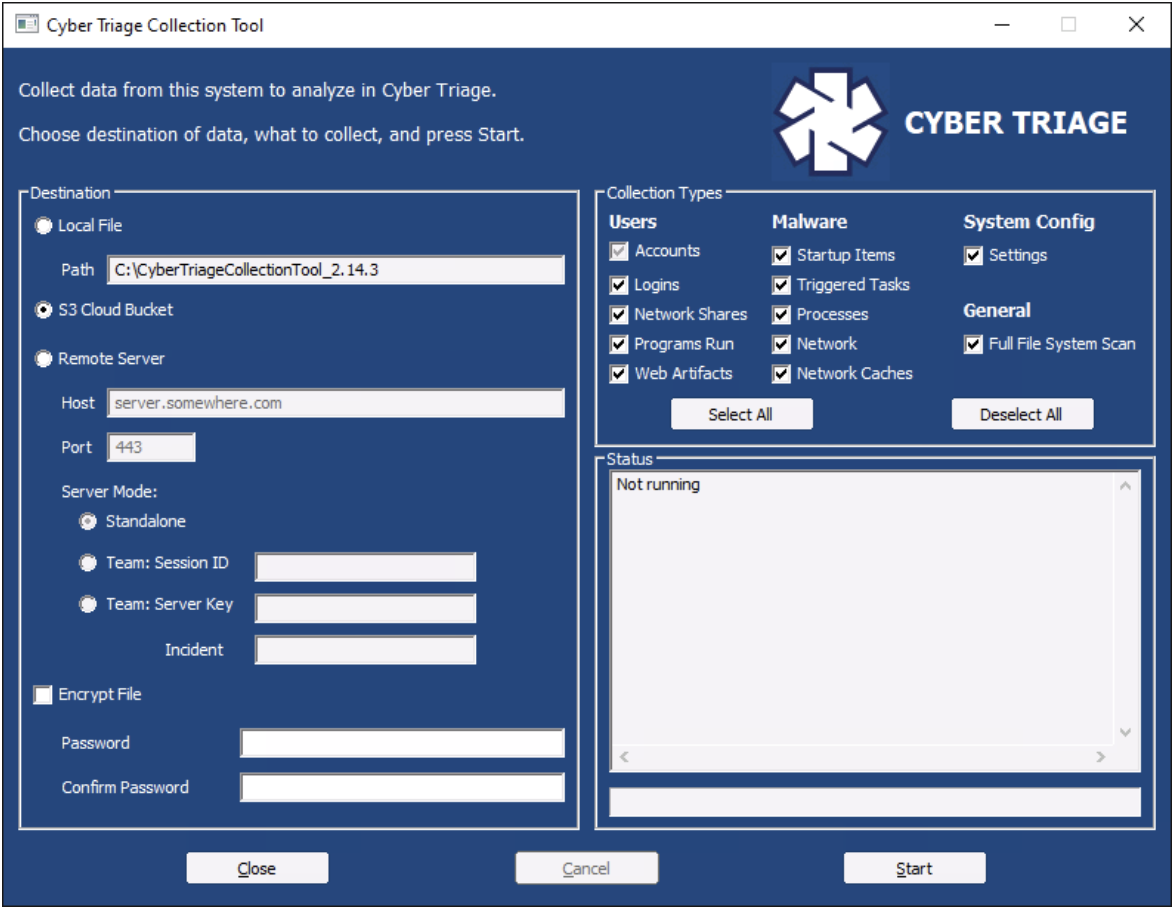
It should automatically have “S3 Cloud Bucket” enabled. The user can then select “Encrypt File” at the bottom and supply a password and then press “Start.” This will cause user accounts, logins, startup items, etc. to be first saved to a local JSON file and then uploaded to the S3 bucket.
Importing from S3
Once the data is in S3, you can then download it using a variety of techniques (including the AWS web application) and then import it into Cyber Triage as a file:

Try It Out
There are other new things in the latest release, but we wanted to highlight how to use this unique feature. To try Cyber Triage, you can fill out this form for a 7-day evaluation.