This post in the “DFIR Next Steps” series is about what to do when you observe a suspicious network logon session. As with previous posts, we’ll cover how you can take this first indicator and then gather more clues about what happened in the attack.
Network logons can be useful to identify remote access into the system, and from this post, you’ll learn more about what a suspicious logon means and how you can take the most advantage of it.
Scenario
The basic scenario in this post is that you identify a 4624 event in the Windows Security log from an unexpected user. This scenario can arise in situations such as:
- Manual review of the event logs and knowing what is normal for the system
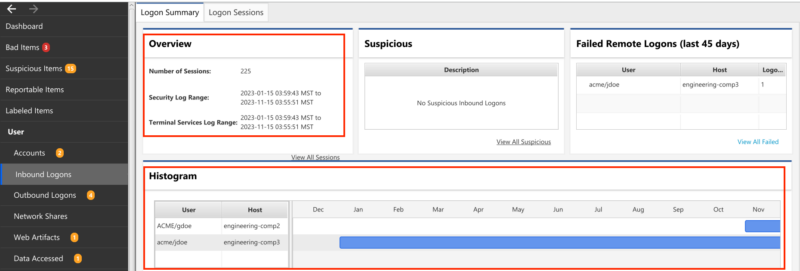
- Using Cyber Triage’ histogram feature to notice that the user just started to use the system. You can see in the example below that the gdoe account just started to access the system.

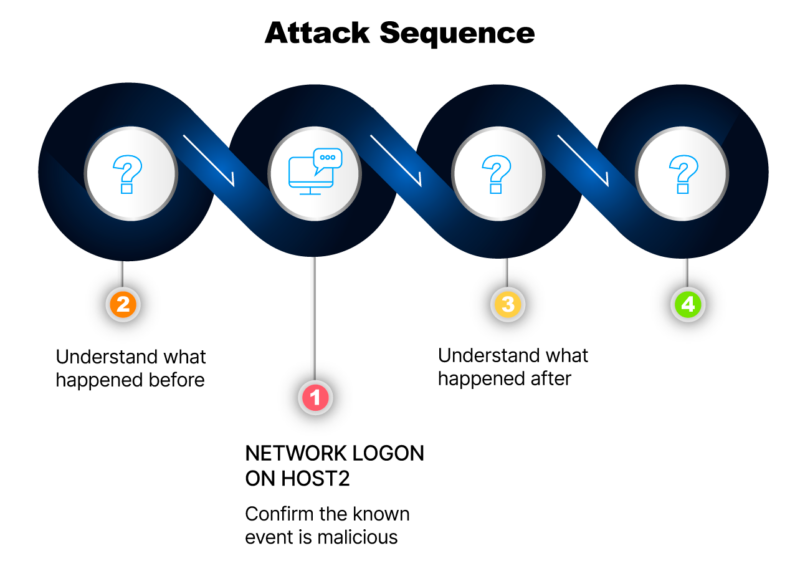
This is a great clue. Now, we need to take full advantage of it. To do so, we’re going to focus on 3 key things:
- Confirm that the known event is malicious
- Understand how the event was generated
- Identify what happened after
Network Logon Basics
First though, let’s look at the basics of the Network Logon Sessions.
Windows creates a logon session after an application authenticates a user. The application gets to pick what kind of logon session is created, and Network Logons are the fastest to create and provide basic access to resources. Other examples include:
- Remote Interactive
- Interactive (local).
Because they are so generic, network logon sessions are created in a variety of scenarios, such as:
- When a user accesses a file share with SMB to read or write files.
- When WinRM / PowershellRemote is used to launch a process
- When Network Level Authentication (NLA) is enabled for remote desktop connections
- When a 3rd party remote access software, such as TeamViewer, authenticates a user before launching programs.
Reviewing logons should be part of any investigation because they show that an OS account had access to the account takeovers are common with many attacks.
You can find the creation of Network Logon sessions by looking for 4624 events with a LogonType of 3. The following fields are also recorded in the event and useful in an investigation:
- The target OS Account that was authenticated
- Timestamp the authentication occurred
- IP address of the remote host that authentication came from
- Process that the authentication came from
- Authentication method
Confirming It’s Malicious
We should confirm that the network logon from the unexpected user is, in fact, associated with an attack before we spend too much time trying to find out how it was generated and what happened afterward.
The usual approaches for this include:
- Understanding the OS account and what it is used for. Is it an employee account, and if so, what is the employee’s job role? Does it make sense for them to be on this host?
- Review historical data on the host to see if this account logged into it before and from where. This can be challenging depending on how far back the logs go and what log parsing infrastructure you have.
- Review other hosts to see where else the OS account is active. To do this, you may need access to domain controller data, a SIEM, an EDR, or other enterprise-level security infrastructure.
In Cyber Triage, the inbound logons panel shows the historical use of that account. As seen below, the histogram on the bottom shows when the user first logged in, and the upper left shows what date ranges there are for logs from this system.
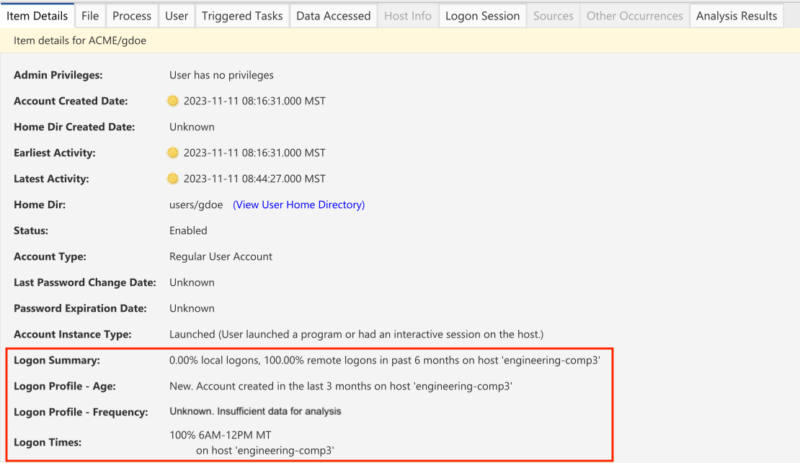
You should also look at the details tab; it will show you the usual behavior of the user on this host. Are they new to the host, or have they been using it for a long time? Do they often log in in the morning or late at night? The below example shows that the gdoe account is new within the past 30 days, all remote logons, and all between 6 AM and 12 PM.
What Happened Before the Artifact?
We know these events are created only when the user successfully authenticates. If the logon is malicious, this implies two things:
- The OS account was compromised and needs to be disabled and further investigated. All actions of that OS Account should be understood.
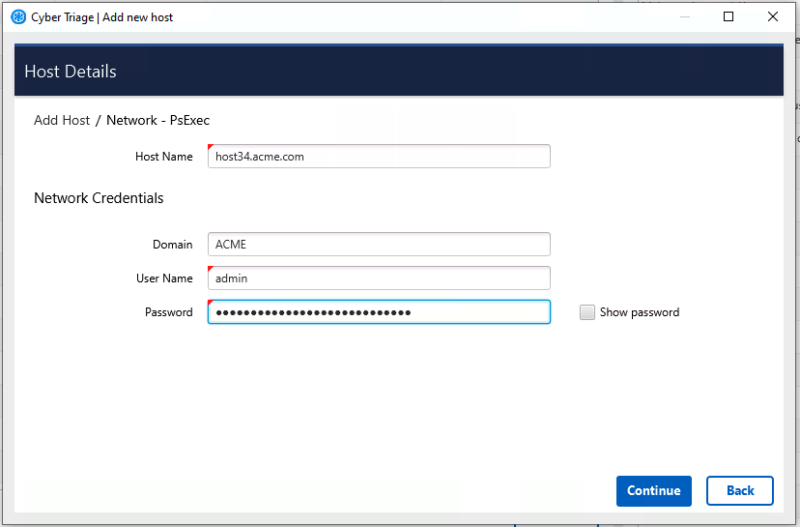
- The attacker was active on the host listed in the logon event. The scope of your investigation has expanded to now include this host, and you should collect from it if you have not already. That host may have clues about other systems that the attacker gained access to. If you are using Cyber Triage, you should start the collection from that host while you finish this host.
Analysis of that previous host (host34 in this example) can help show what the attacker was doing. You can initially focus on a timeline view of that host at the time of the logon to see what was happening.
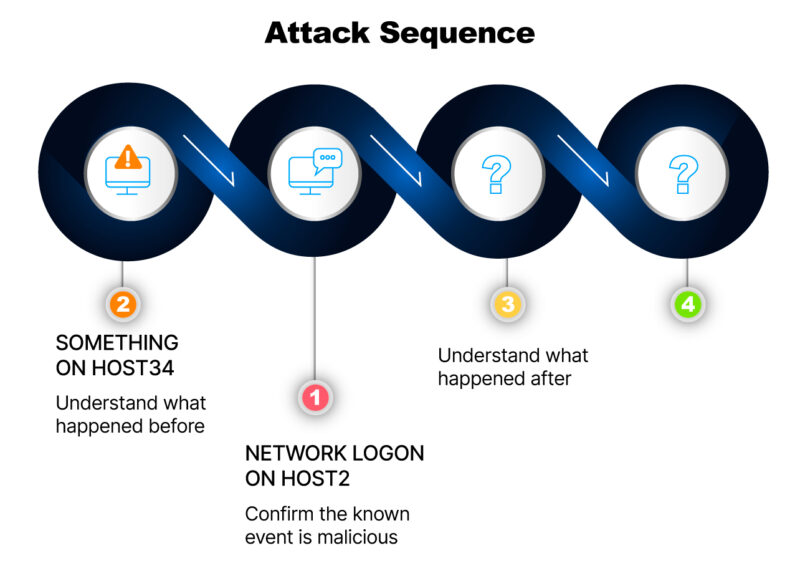
What Happened After The Artifact?
The challenge with this event is that it does not give much indication about what happened afterward. It all depends on which application authenticated the user.
Examples include:
- If the application was SMB, then files could have been copied to or from the host
- If the application was PowerShell, then processes could have been created.
So, to fully understand what happened after the event, it can be useful to try to identify which application it was. The Event log entry may have a process name. That can be used to identify which process requested the authentication, and you can then use knowledge about that application to understand possible impacts.
Otherwise, timelines and searches can be useful. Viewing a timeline of all activity on the host, including file and registry creations, after the logon event could show related entries from other logs, such as Powershell or TerminalServices.
For example, you may be able to merge all the event logs and see that there is a Terminal Services event after the network logon, which implies the network logon could be from Network Level Authentication (NLA). Terminal Services uses network logons to first verify the user is going to properly authenticate before it starts up the full UI infrastructure.
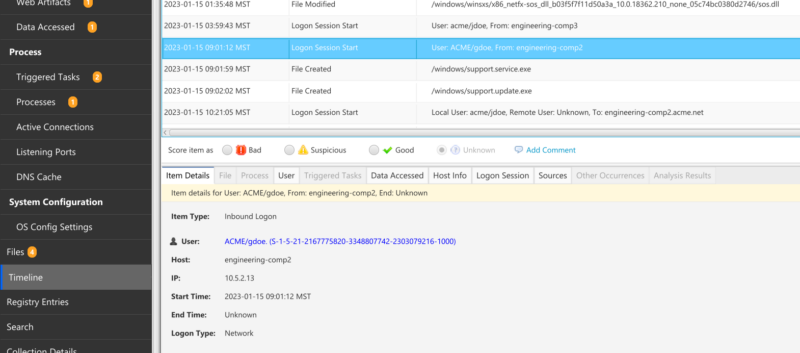
Similarly, looking at a timeline with file activity could also show if there were new files being created right after the logon session. In the example below, you can see the /windows/support.service.exe file being created after the network logon.
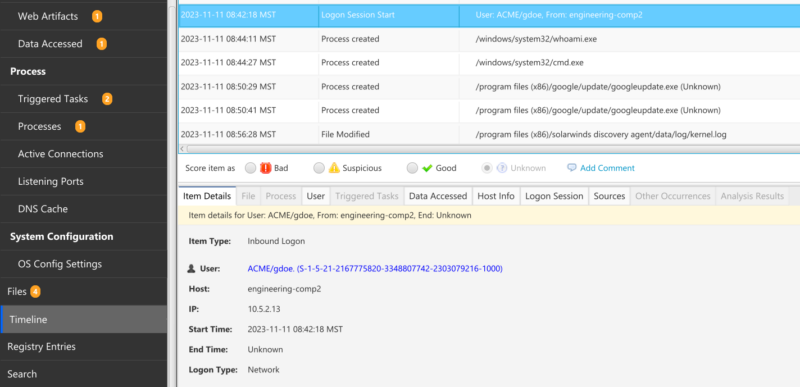
Or, you may see a process launch, such as seeing ‘whoami’ and ‘cmd’ in the following timeline:
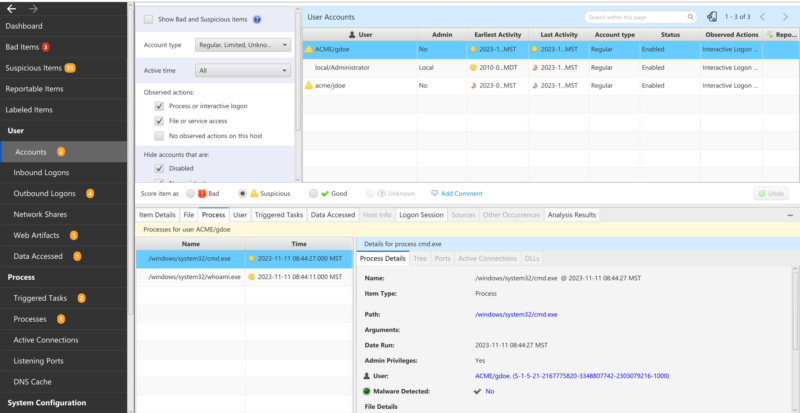
Another approach is to look for all activity associated with that user, which should be limited if they are not normally on that host. Some applications do not make this easy, though.
In Cyber Triage, you can go to the Accounts view, select the user, and then see the processes and files associated with that user (which is pretty easy…). You can see here that the user had the two processes we previously saw in the timeline (cmd and whoami).
Conclusion
Network logons from an attacker are useful to identify and use as leads. From them, you can:
- Move backward in the attack sequence to the host the attacker came from
- Move forward to identify the next steps
The biggest challenge with network logons is that they are used for so many types of activities. You’ll need to do some work to determine whether it was from a file share access, Powershell, or other remote access. We’ll cover that more in future posts.
If you want to make your remote access investigations more efficient, try out Cyber Triage with the free 7-day evaluation.