Using timestamps to determine what happened before or after an event is vital when investigating your endpoints. Timestamps allow you to see what programs were run or websites visited that may have been involved in a suspicious event. The latest Cyber Triage 2.3.0 release includes a new timeline feature that makes this type of investigation easier.
When to Check the Clock
Timelines can be used at several points during incident response. Here are some scenarios:
- You find a file that has malware and you want to know how it got there. You can use a timeline to see what events happened before the malware file was created. Sometimes you can see web download activity or remote logins.
- You see a suspicious remote login and want to know what the user did. You can use the timeline to see what programs were run, files created, or processes run after the login occurred.
There are hundreds of thousands of events on a system and you can’t possibly look at all of them. Timeline allows you to narrow down your search to a certain time range.
Timeline in Cyber Triage
The timeline in Cyber Triage can be accessed from the left-hand menu below all of the data types that were collected by the agentless collection tool (such as startup items, processes, and users).
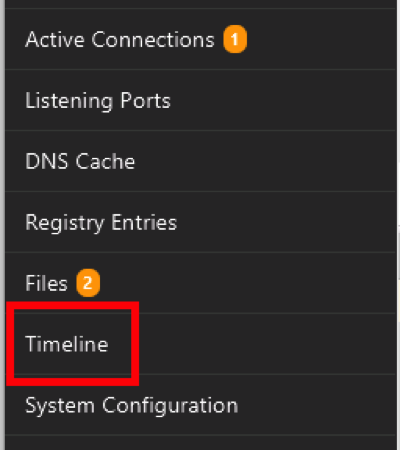
Selecting “Timeline” allows you to see a table of all the events that occurred during a given time range. Cyber Triage will show timestamps from files, user logins, web activity, processes, scheduled tasks, programs run, and more.
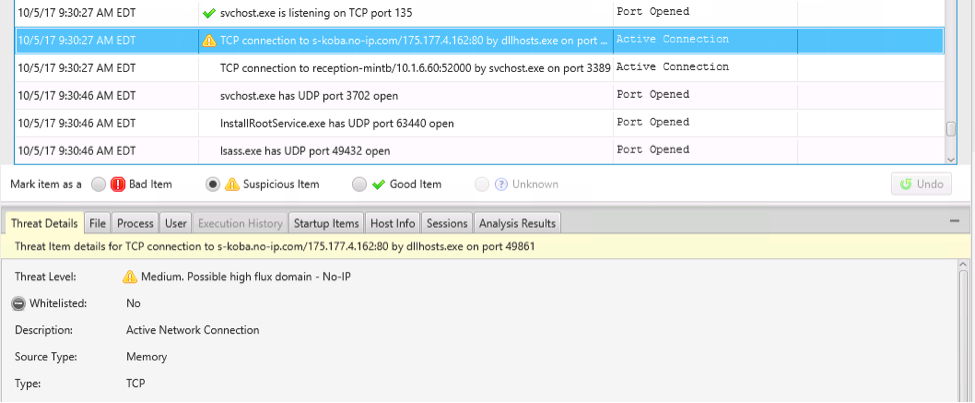
Selecting an event shows you the details on the bottom.
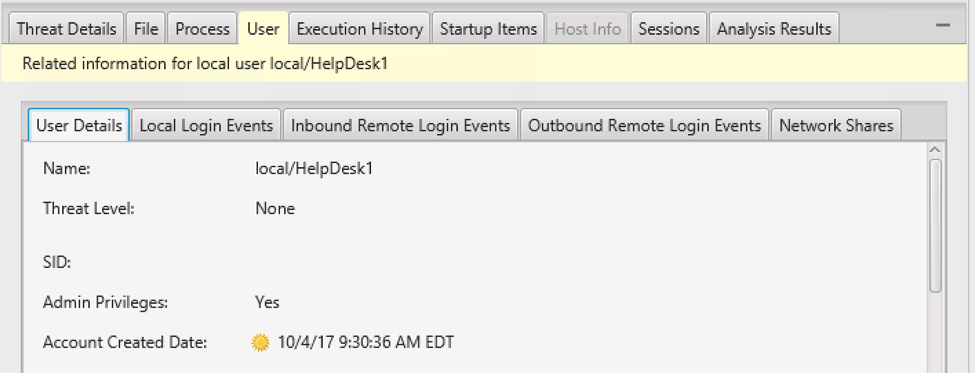
In addition to opening the timeline from the left-hand item, you can also right click on a row in any of the other tables that show collected data, such as “Users.” In the below image, we can jump to when the user account was created to see what happened before that.

Let’s look at an example. We want to analyze a laptop, so we send the collection tool over the network to it. Data is sent back to Cyber Triage and the OPSWAT malware scanning engines flag an executable. This is our initial clue that a suspicious event occurred and we want to learn more about it. In response, we view the time the file was created in the timeline:
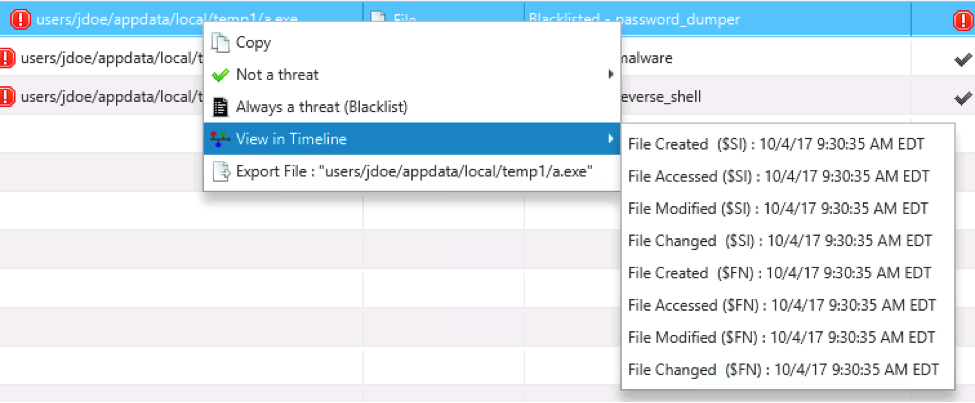
Notice all of the times for this file. Files stored in NTFS file systems have 8 times associated with them: 4 are stored in the “Standard Information” attribute, and 4 are in the “File Name” attribute. All 8 of them were collected by Cyber Triage and you can choose which to view in the timeline.
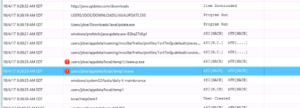
Next, we view the file created time and immediately notice:
- Before the suspicious file was created, there was a file downloaded and run from the Downloads folder.
- After the file was created, we see a scheduled task and user account were created.
If we want to determine if the newly created user account was later used for logins, we can select its row and see its details.
Getting Cyber Triage
To try the timeline on your investigations, you can download the latest version of Cyber Triage using this form. You’ll automatically get a free trial to evaluate Cyber Triage’s paid features. After the first 7 days, your access will revert to the free Cyber Triage Lite, which focuses on collection and basic display.
Contact sales@cybertriage.com for a premium Cyber Triage quote, or support@cybertriage.com with any technical questions.