Cyber Triage version 3.4 is out and this blog post covers three big, new features to help you have a more comprehensive response:
- User Logons – You can now better focus in on anomalous accounts and see what logon session was active at a given time.
- Recorded Future Sandbox Integration – You can now get more details on a suspicious executable or document by uploading them for dynamic sandbox analysis to Hatching, which was recently acquired by Recorded Future.
- BITS Jobs – Microsoft BITS Jobs are now collected and scored from the target system. These are used by attackers to move data and maintain persistence.
You can get the full set of changes here and download the latest evaluation version.
New User Logon Interfaces
What Is It?
To better handle large data sets and detect lateral movement, Cyber Triage has a new interface for showing logons and breaks up inbound and outbound logons. Cyber Triage previously had a single “Logon” panel that had both inbound and outbound merged.
The new release:
- Makes it easier to focus in on anomalous behavior.
- Merges events from the Security and Terminal Services log so that you do not see multiple events for the same session.
- Records log off and disconnect times to give you the full duration of a session.
- Summarizes session data to allow you to quickly focus on new users or remote hosts.
Example Use Cases
- Compromised Credentials: If an attacker has learned about a username and password and this system is public facing, then they could be using remote desktop to access the system from their infrastructure. The new interface allows you to see anomalous hosts.
- Lateral Movement: If an attacker has gained access to the host being investigated, then they could use RDP and other means to log into other hosts in the network. The “Outbound Logons” panel will highlight what hosts the attacker went.
How To Use It
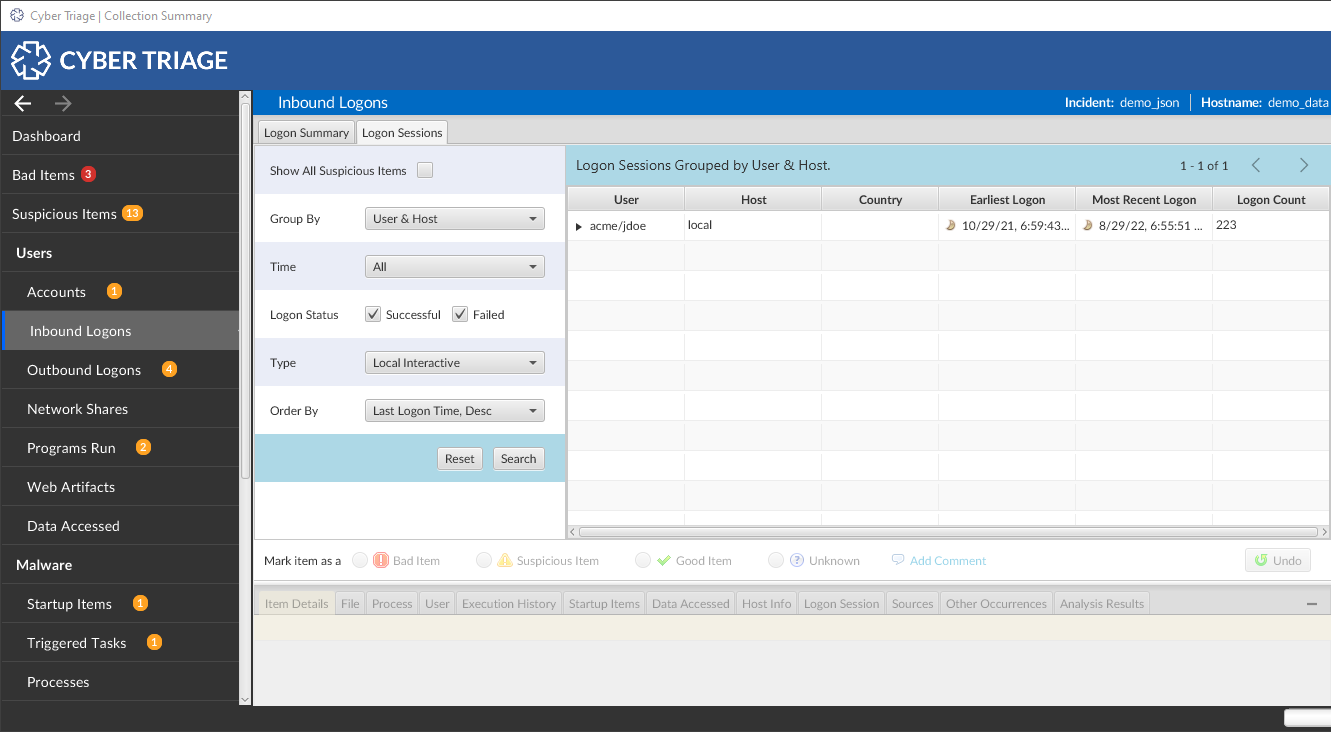
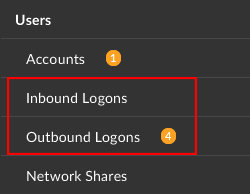
In the Navigation Menu on the left-hand side of the Cyber Triage dashboard, you will see “Inbound Logons” and “Outbound Logons.” Click either of these buttons, and you will be brought to a new section that outlines the data available for review.
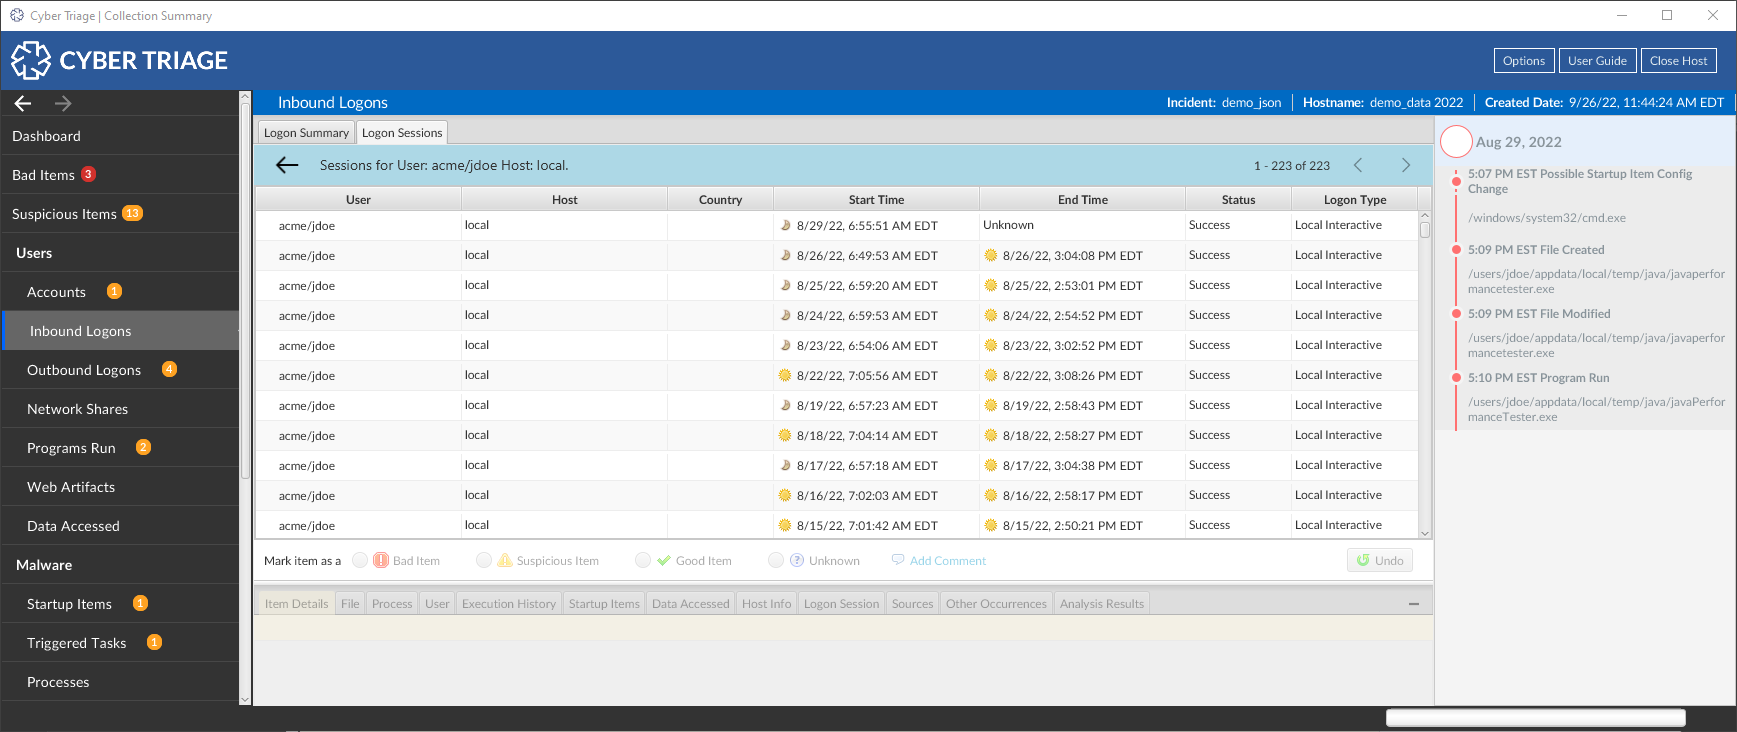
In this section you will see user logons grouped by time, which can be filtered and grouped in a new panel on the left-hand side of the File Panel. Expand the groups to see a complete list of logons.
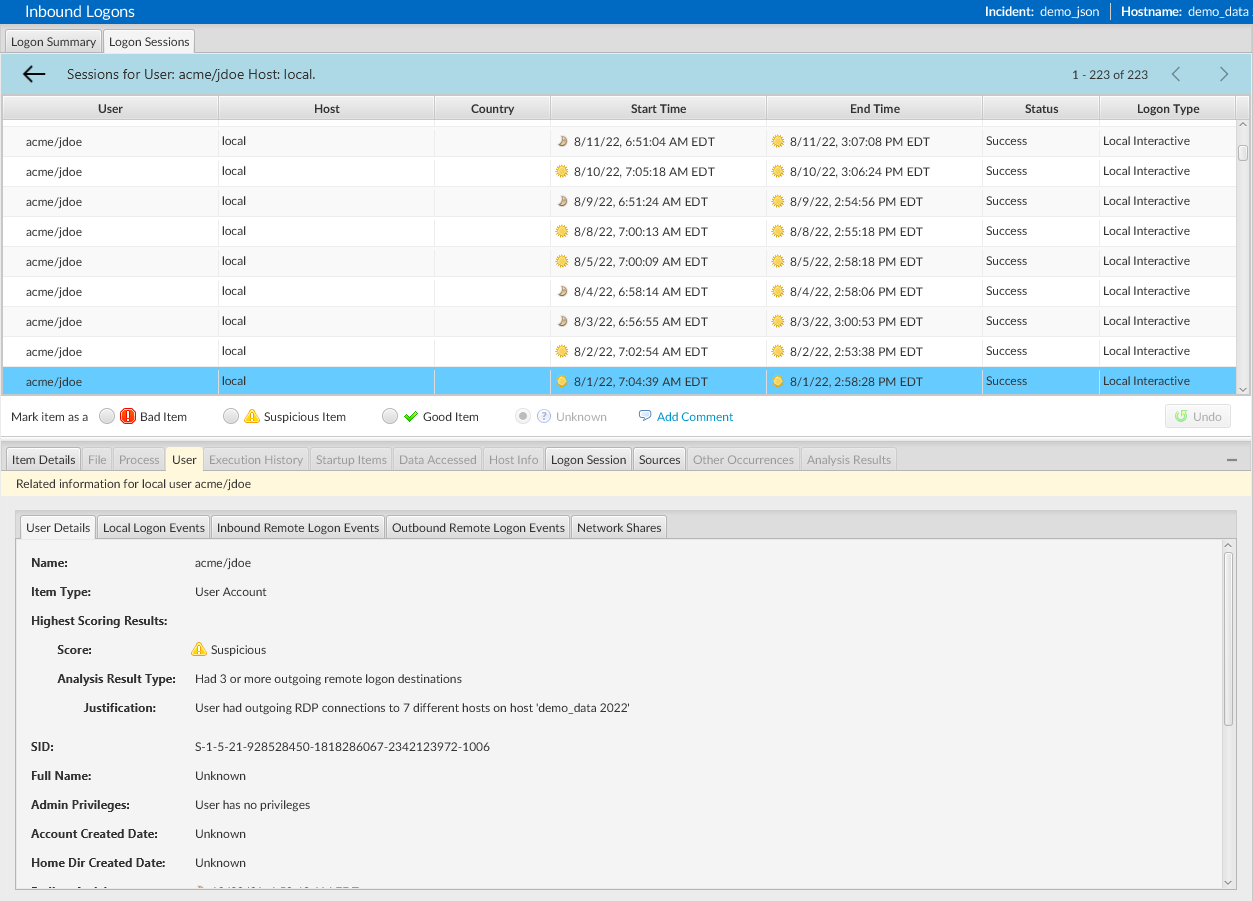
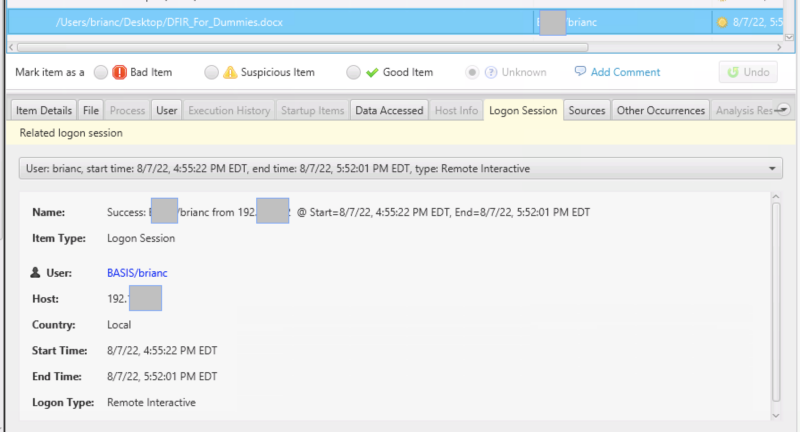
Once you select a logon, you can see the activity associated with that logon session under the “User” tab in the Info Panel. This tab will show user details about the specific user, including any suspicious activity.
Under the “User” tab, there are further tabs for incoming and outgoing local and remote logons and any network shares found.
Map Activity to a User Logon Session
What Is It?
Along with the user Logon interfaces, there is a new panel in the lower right to show you which user did the activity you have selected. For example, if you select a “Program Run” artifact, you can see where the user logged in from when they launched it. The below example below shows the session associated with a Data Access artifact.
How To Use It
Whenever you select an artifact that has a date, this tab will search the logon sessions for one that matches the time range and user. If there are multiple possible sessions, all will be shown. This feature requires that logon data exists, which comes from the Security and Terminal Services logs. If those logs do not exist or auditing levels were not sufficient, then the session will not be shown.
Dynamic Sandbox Analysis Using Hatching
What Is It?
Recorded Future has acquired Hatching, a fantastic malware sandboxing tool that allows you to submit suspicious files and receive a plethora of relevant information about the file and how it works. This information can be crucial in a DFIR investigation; now you can access it right inside Cyber Triage!
Just submit files to the Recorded Future Malware Sandbox and receive the results (in about 2 minutes) from Recorded Future directly in the “Details” panel on the main Cyber Triage dashboard.
Example Use Case:
- Suspicious File: Cyber Triage and its Reversing Labs integration may identify a file as suspicious. You can get more details about what the file does by uploading it to the sandbox for analysis.
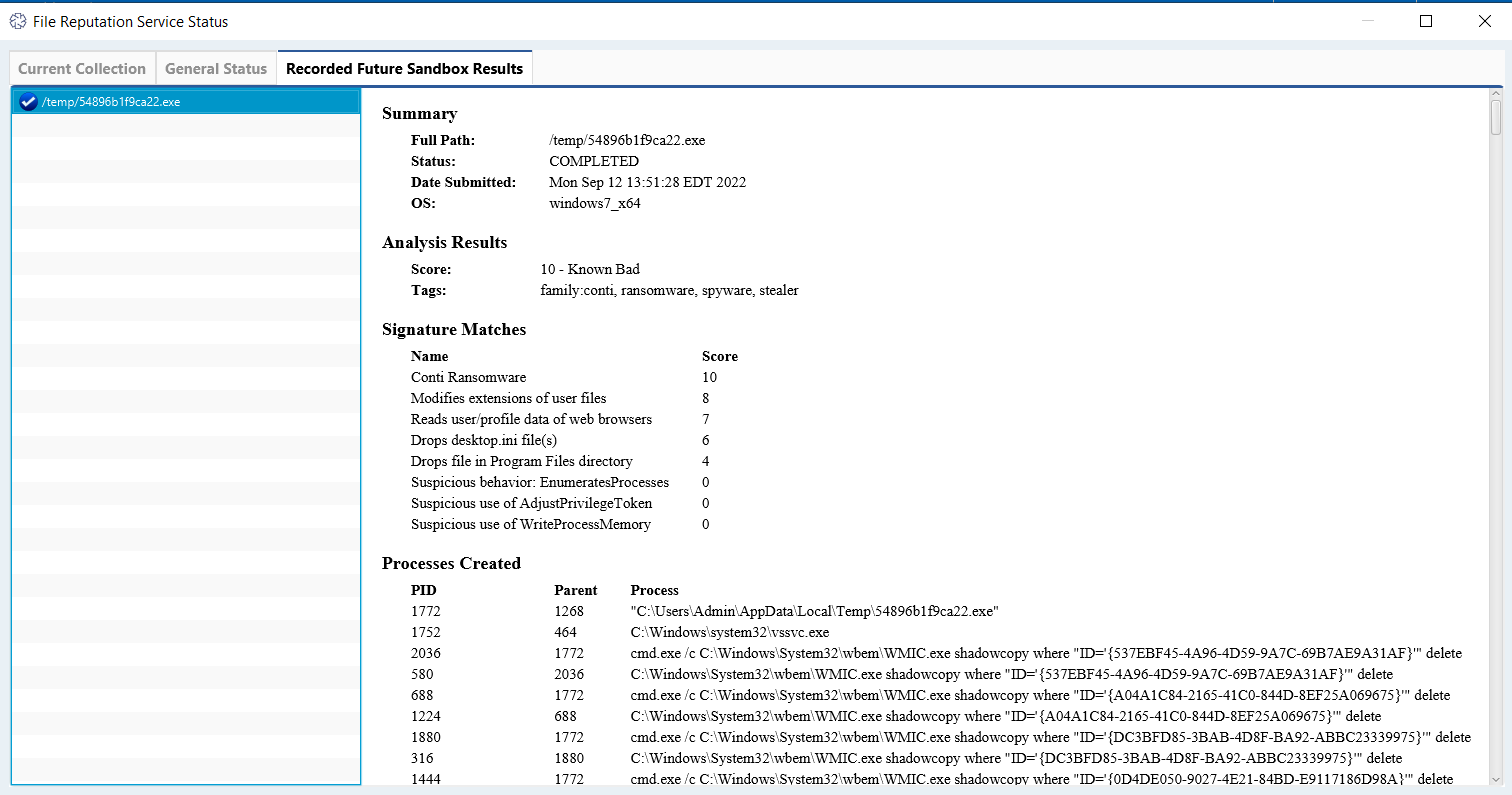
- Understand the attack: Once you receive your report from Recorded Future, you will see a list of multiple association file properties about the file you submitted, allowing you to understand the threat you are facing and immediately get a jump on mitigating the malware on your networks.
How To Use It:
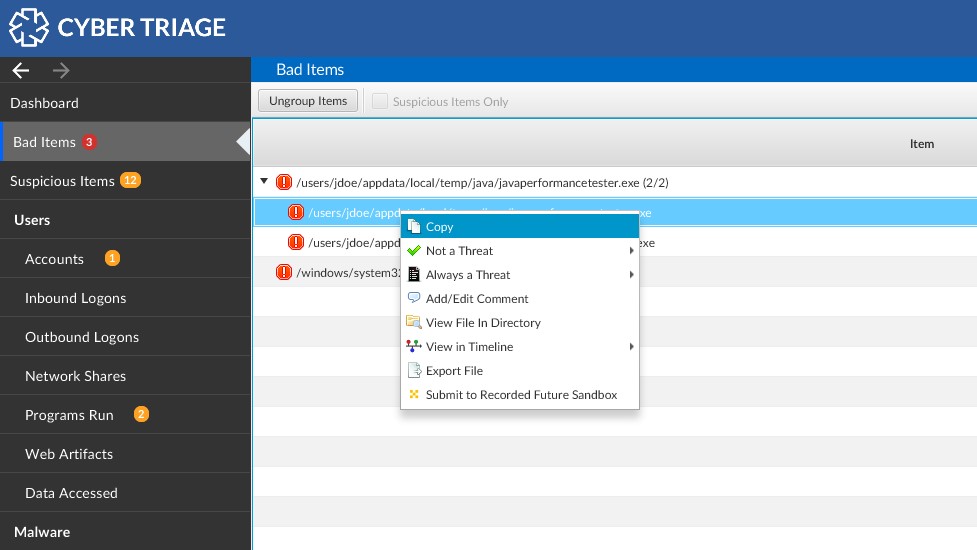
In order to submit a file to the Recorded Future Malware Sandbox, simply right-click on a file and select “Submit to Recorded Future Sandbox.”
It will take 2 to 3 minutes for the file to be analyzed. Afterwards, you can go to the Dashboard and select the “Details” link next to File Reputation Services.
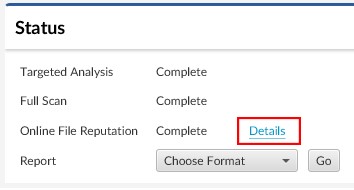
In this panel choose “Recorded Future Sandbox Results.” This will allow you to see the returned report from Recorded Future to assist in your investigation.
Microsoft BITS Jobs
What Is It?
Cyber Triage will now collect the database and event log associated with the Windows Background Intelligent Transfer Service (BITS) Jobs (MITRE ATT&CK). BITS Jobs are used by attackers to download files and maintain persistence.
Cyber Triage will collect and parse the database and create “Triggered Tasks” out of each of the jobs that are still in the database (which are those that have not run, are running, or had an error). Cyber Triage will also parse the event log and create disabled tasks for past jobs and create a “Process” entry for any job that had a “Notification Task” that ran after the download job.
Example Use Case:
- Malware Download: Reviewing the jobs may show what tools an attacker downloaded onto the system.
- Persistence: If the notification executable fails to run after a download, the BITS service will try again later. This is a form of persistence that some attackers use.
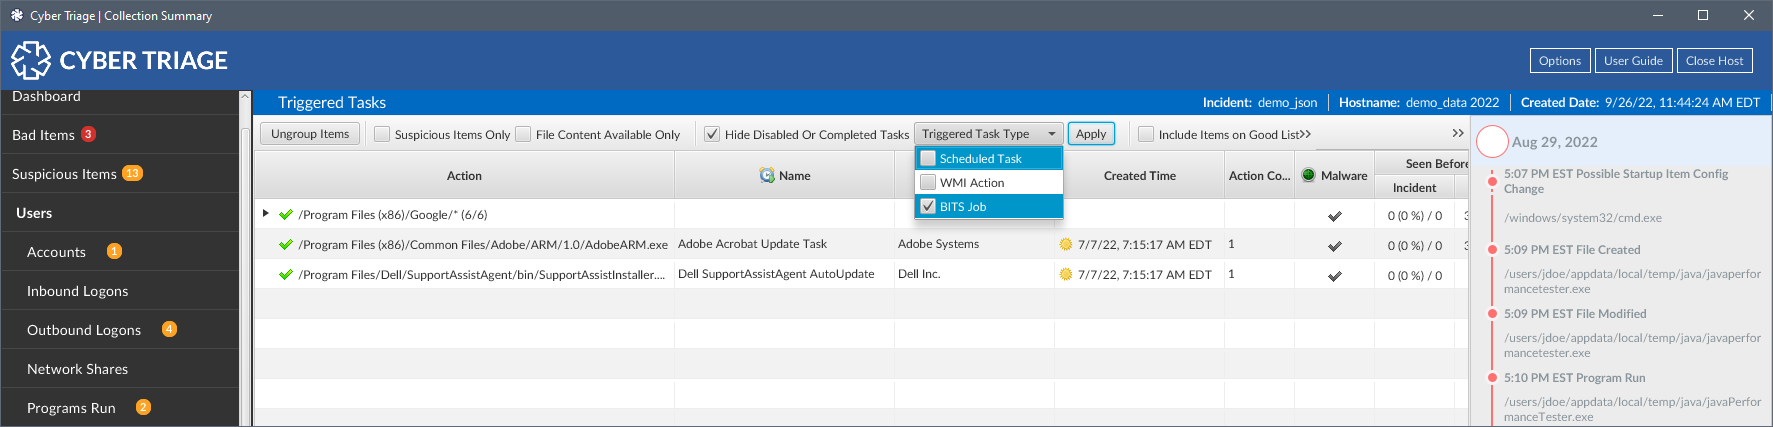
How To Use It:
BITS Jobs are now listed in the Malware subcategory “Triggered Tasks.” These can be found by selecting Triggered Tasks in the left-hand Navigation Menu. From here you can see the path of the job, the process that triggered it, the creation time, and other information about the process.
And That’s It For 3.4.0!
If you need assistance with any of these new features (or have any questions), please reach out to support@cybertriage.com.

Get the latest evaluation version of Cyber Triage.
View the Cyber Triage User Guide for help.