
As AI enables attacks at unprecedented speeds, defenders and DFIR teams must also respond at unprecedented speeds. CrowdStrike reported that breakout time after initial compromise is down 65% to 29 minutes.
Fast responses require:
- Automated investigation tools to quickly find evidence and clues of novel techniques without human intervention.
- Investigators who can make efficient and effective decisions when there is serious impact.
Investigation processes are often based on manual techniques though. They need to change along with an upgrade in automated investigation tools.
This post covers the four steps we use to enable the investigator to make efficient decisions using automated tools.
Automated Investigation Tools Enable Investigators
Automated investigation tools collect and prepare data for you to make efficient decisions.
Capabilities often include:
- Normalizing data into a consistent format.
- Enriching data with threat intelligence and knowledge about the item.
- Scoring based on its relevance to an intrusion (bad or suspicious).
- Correlating with other hosts to see what’s related and where else it exists.
Automated tools do the tedious work so that you don’t need to. Once your automated tools are in place, you need processes to match them.
Decision Making Using Automated Investigation Tools
Many people taught DFIR or endpoint triage learn using manual tools. They learn to look at Prefetch artifacts or to review BITSJobs.
Those artifacts are still relevant for fast investigations, but machine-speed investigations use software to find the evidence. Humans get involved only for the <1% that are relevant.
This is how we train people to use Cyber Triage to triage a host:
- Get a baseline: Spend 1-2 minutes understanding the basics of this host before you try to make any decisions about events or artifacts.
- Decide and understand the bad: Review the items scored as bad and identify their impact.
- Decide on the suspicious: Use your baseline and bad item knowledge to make decisions about the suspicious.
- Fill in the gaps: If needed, look for missed evidence based on time or tactic.

This process builds up your knowledge of the host and attack so that you can make good decisions.
Step 1: Host Overview
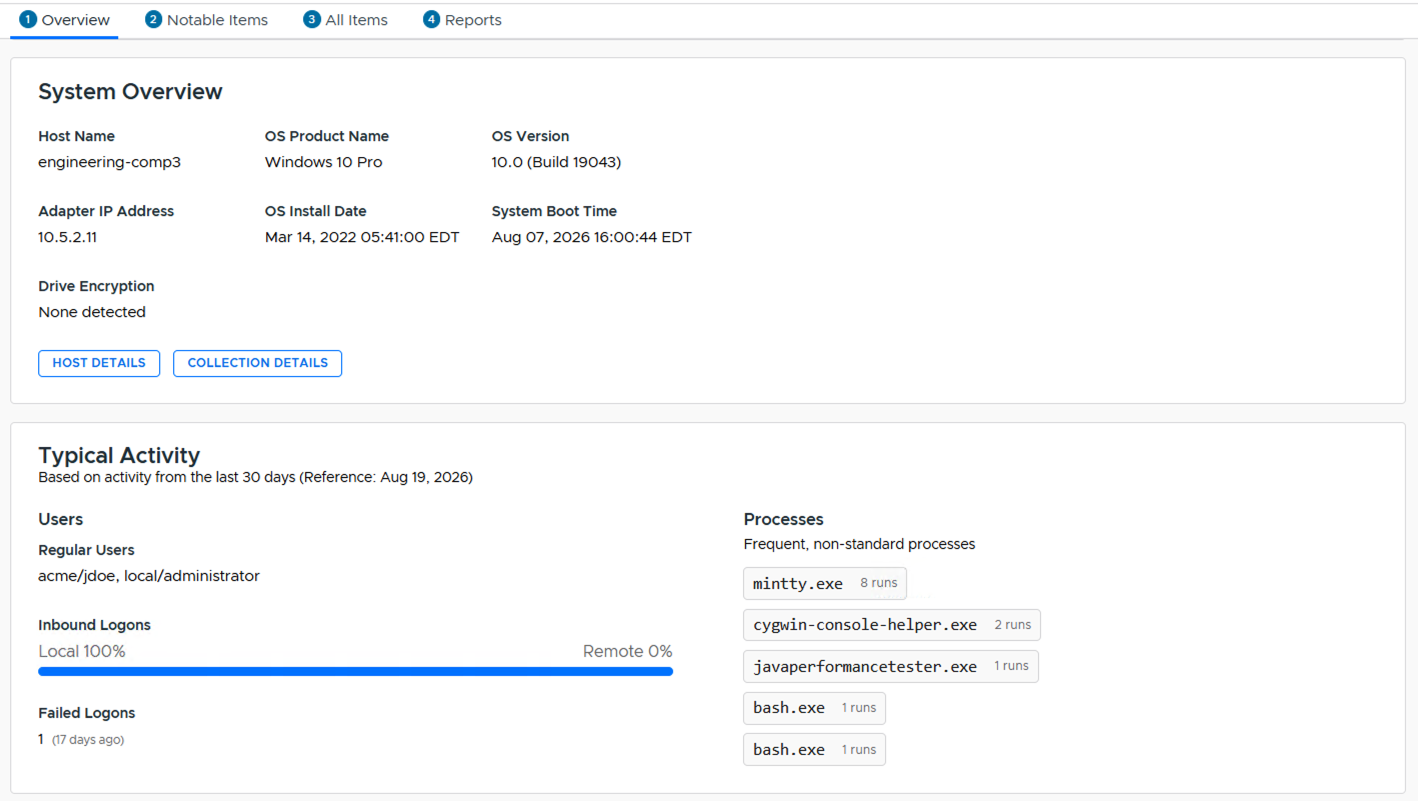
Before you can make decisions about a specific artifact or event, you need basic knowledge of the host. Spend a minute (or maybe two) understanding the host. Ideally, your tools generate this summary for you; otherwise, you may need to poke around.
What OS is it? Who uses it? How do they login? What programs normally run?
Cyber Triage puts these all in the Overview panel of the host when you first open it:
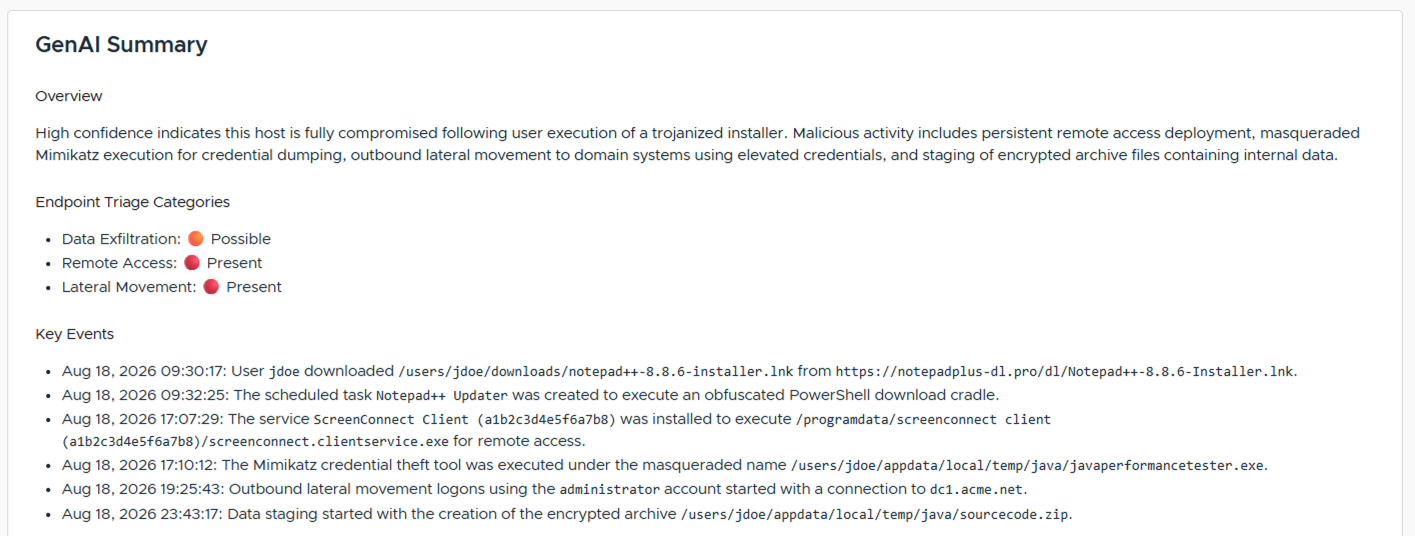
Here you can also read the GenAI-created summary.
Step 2: Decide and Understand the Bad Items
Next, look at the items scored as Bad. These have the lowest false positive rate. Your goals are:
- Confirm the item is in fact Bad and not a false positive
- Understand what must have happened before it (i.e. did the person need admin, get tools, etc.).
- Understand what may have happened after it.
Ideally, your automated tools help answer those questions. This is the best use of your time because it efficiently builds your knowledge of what happened on the system and helps you clear up any automated mistakes.
In Cyber Triage, the Notable Items interface can filter on bad items for you to review.
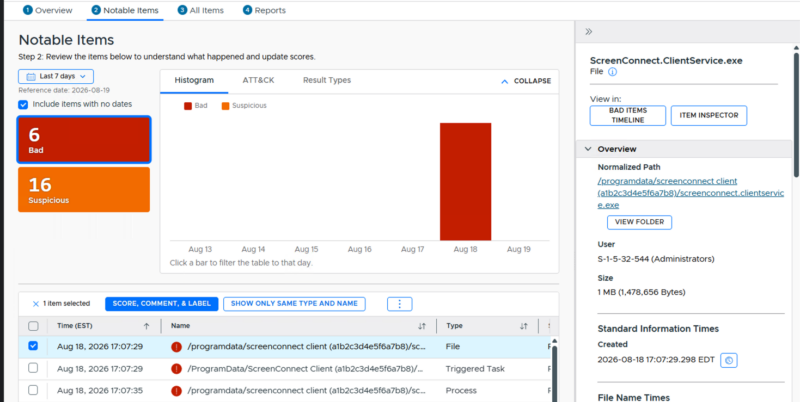
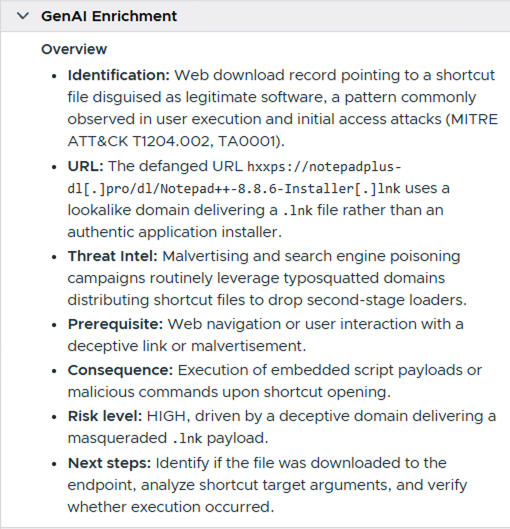
The summary panel on the right provides event details, including AI Enrichment.
Step 3: Decide About the Suspicious Items
Next comes the hardest part. Deciding if an item marked as suspicious is in fact bad or a false positive. These are hard because they can be either normal or malicious. It depends on the system.
But, after doing the host overview and understanding the bad items, this should be easier.
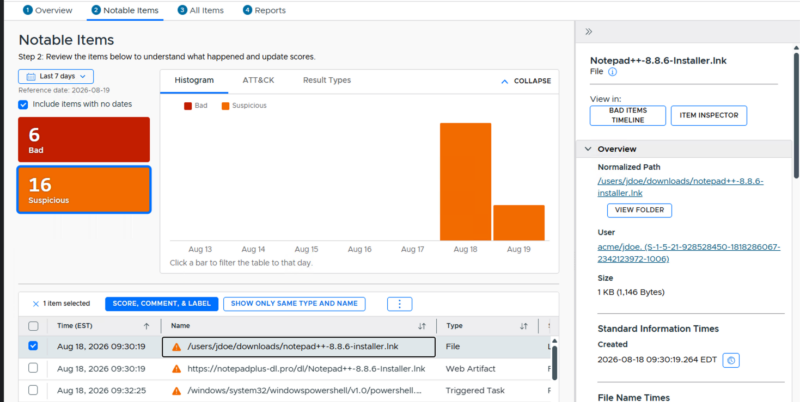
For example, a process from 3 days ago was flagged as suspicious, but the executable is no longer there or you don’t know what arguments were used. You need to understand the process context to decide whether it was likely malicious.
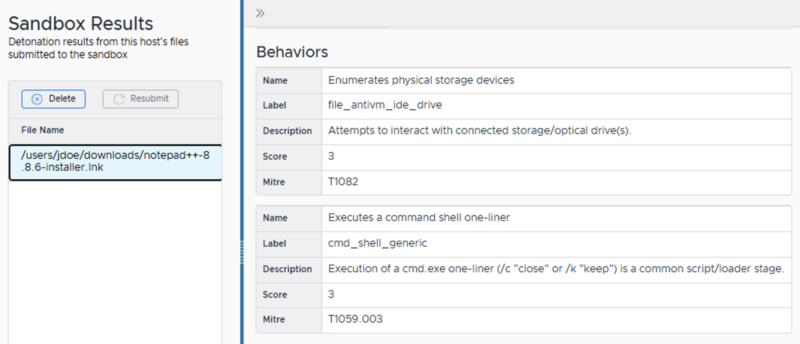
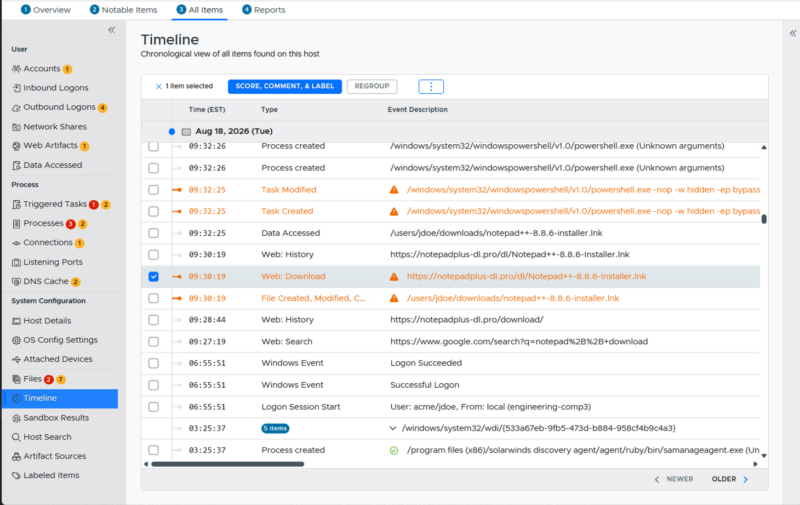
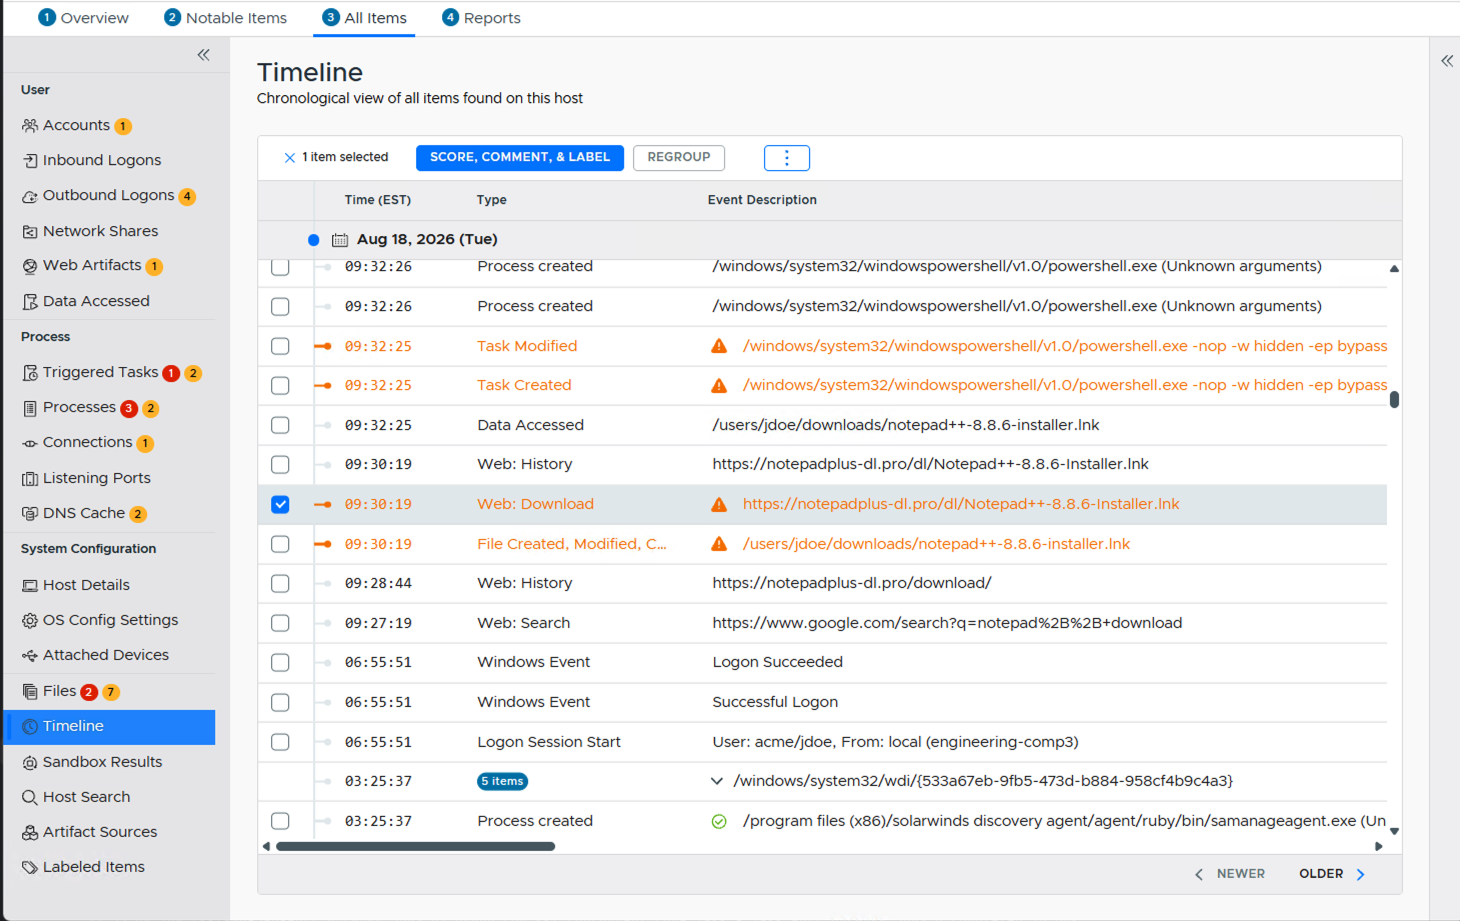
Cyber Triage has several ways to help in this process:
- GenAI Enrichment
- Sandbox analysis
- Other Occurrences
- Viewing in a Timeline
- Viewing in File Explorer
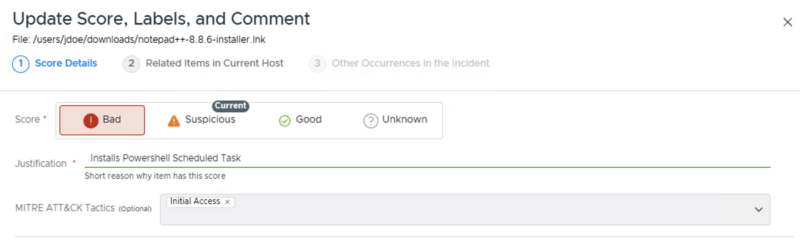
Ideally, your automated tool will help you in this process and make additional recommendations once you’ve committed to it being bad. Cyber Triage allows you to update the score to Bad and get recommendations once you’ve made that choice.
Step 4: Fill in the Gaps
The final step in this automated investigation process is to use the bad items as stakes to look for gaps in the timeline or missing tactics. This can be a manual process or assisted by automation.
Using Incident-level MITRE Tactics and timelines can help with this process.
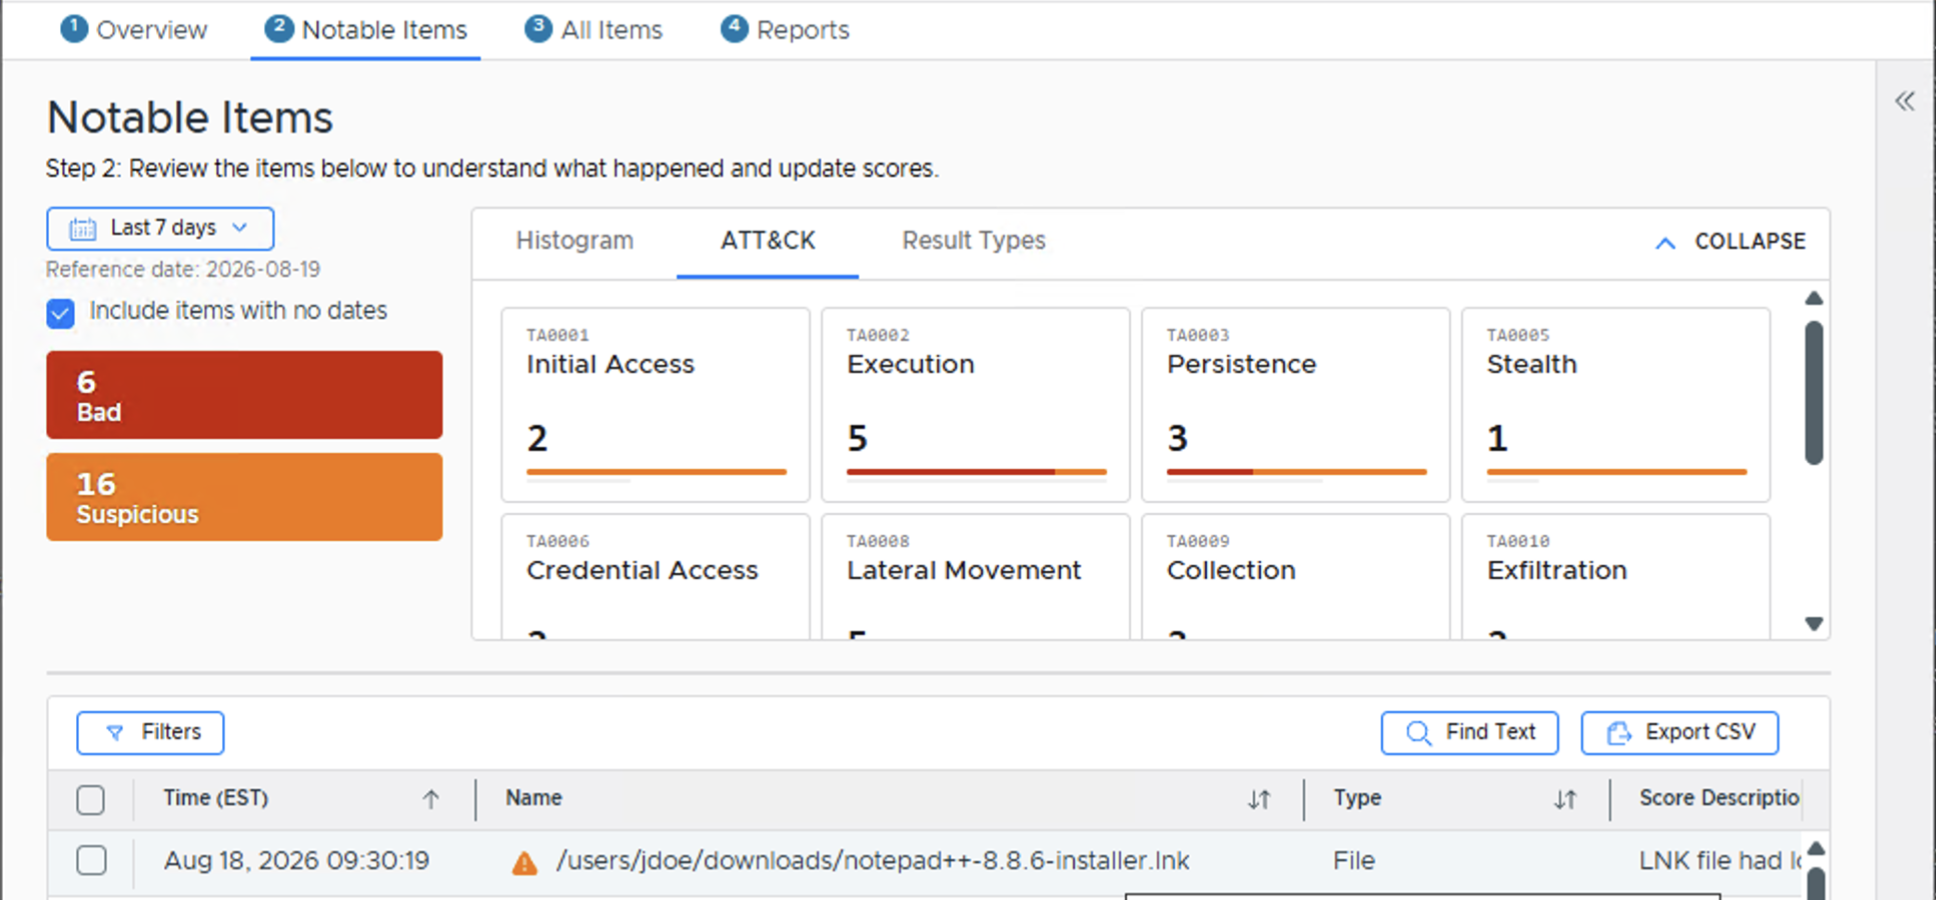
For example, you may not have found any evidence of persistence yet. Attackers often install some method that survives a reboot. Before the incident is closed, you should consider whether it is on this host or another.
Automated Investigations Require New Processes
All organizations need to adapt to faster attacks, and manual investigations won’t cut it. The solution is both tooling and the process that analysts follow.
If you need an automated endpoint triage and investigation tool to contain attacks, try the 7-day trial of Cyber Triage. It uses your EDR infrastructure to quickly collect and analyze additional endpoint data so you can confidently and quickly determine the impact and scope of an attack.