Our “Free DFIR with Cyber Triage Lite” series now dives into the actual value of Cyber Triage Lite: having a UI to review the collected data. After all, there are several free collection tools out there, but nearly all of them will give you a folder of text files to review.
Cyber Triage Lite will make your free-response faster by making it easier to review the data, identify anomalous artifacts, and generate a report.
In this post, we are going to focus on using the UI to review user activity. We’re also going to review our approach to DFIR investigations, which we call “Divide and Conquer.” Then we’ll dive into web artifacts (downloads and history), programs that were run (prefetch and user assist), and logins (from event logs).
We will assume that you’ve already read our previous posts and collected data from a live host or disk image

Divide and Conquer DFIR Process
To help understand how we organize data in the UI, let’s review the Divide and Conquer DFIR process, which is how we approach digital investigations.
The basic concept is that you’ll start with an investigative question (such as “what did the attacker access”?) that is often hard to answer. The solution is to break it into smaller and smaller questions that can be answered with a single type of artifact. It uses the fundamental problem-solving technique of breaking a hard problem into smaller and easier problems.
As several of our previous posts and videos have outlined, we often break the questions down into groups about:
- Users: Was there suspicious user activity?
- Malware: Was there malicious programs?
- OS Configuration Settings: Was there malicious system changes?
Each of those is further broken down (we’ll break down users in the next section).
That’s the gist at the high level. To learn more, refer to:
- Blog Series
- Online Video Course (3-hours)
Investigating Users and their Activity
Your DFIR investigation will likely look at users because account takeover is a big part of intrusions from stolen passwords and phishing attacks. A computer may not have malware on it, but may have signs of a compromised user account, so it should be looked at.
Cyber Triage Lite allows you to investigate users, and its UI is organized around the Divide and Conquer concepts.
It breaks the question of “Was there suspicious user activity?” into smaller questions that can be more easily answered. Notably:
- Which users were active on this system?
- Are there suspicious logins to the system?
- What did the users do when they were logged into the system?
Which Users Were Active on the System?
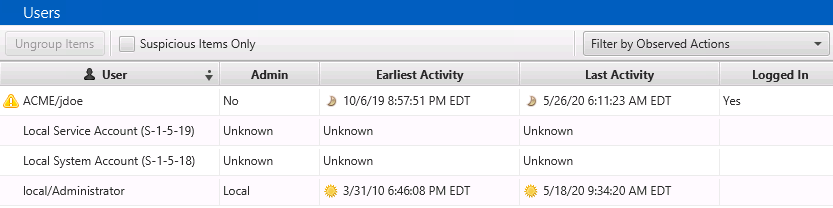
Choosing the “Accounts” tab on the left of Cyber Triage Lite will show you the list of OS Accounts from the registry hives and references to accounts that were gleaned from event logs.
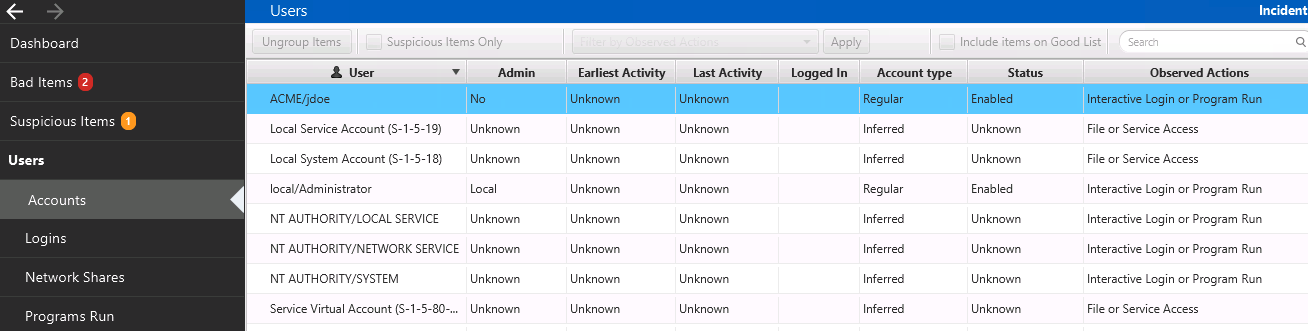
The Lite version does not aggregate the login activity to provide the earliest and latest logins, so those columns are marked as “Unknown”, but you can see the types of actions that the accounts performed on that system. Such as if they had interactive access or just accessed a resource on the system.
Refer to the Intro to DFIR Series: User Enumeration on what to look for when identifying a suspicious account.
The paid version of Cyber Triage will flag user accounts as suspicious based on login behavior and provide a summary of the user activity.
Once you’ve selected an account, you can use the bottom area to get more details. This is how Lite becomes more valuable than just looking at piles of text files.
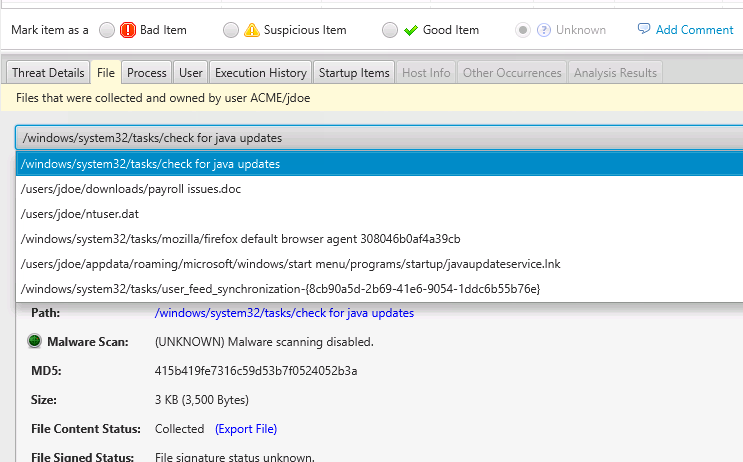
The “Files” tab will show you what files were owned by that user and were collected by the Collection Tool. Note that the user may have had other files, but this list is only the ones that content was collected for:
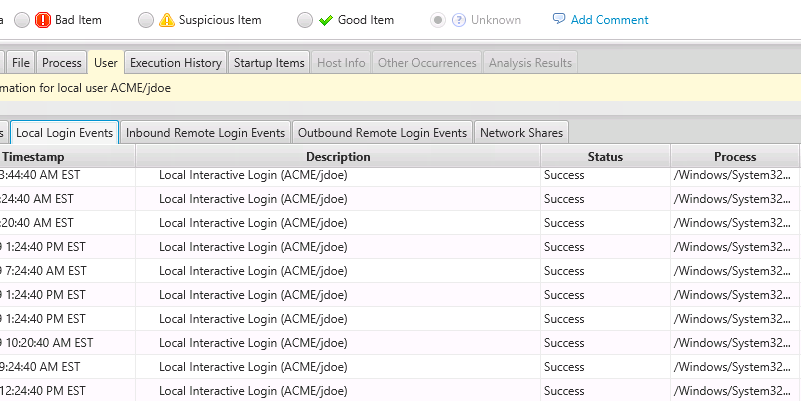
The Processes that were running for that user under the “Process” tab and the “User” tab will give you access to remote and local logins (from various event logs):
If you decide that any user account was part of an attack, you can score them as “Bad” by selecting the “Mark Item As:” section.

Were There Suspicious Logins?
The next question that Cyber Triage Lite can help you answer is about logins. You’ll want to review logins to look for lateral movement and account takeovers.
Refer to Intro to DFIR Series: User Logins for basic concepts on what to look for when reviewing logins.
When you choose the “Logins” menu on the left, you can see the logins that were found based on event logs. The amount of data will depend on the audit settings on the system.
The value of Cyber Triage lite over manual review is that it is mapping various event log types into inbound, outbound, or local and grouping the entries.
By default, remote logins are shown (inbound and outbound), but you can change that by using the pull-down.
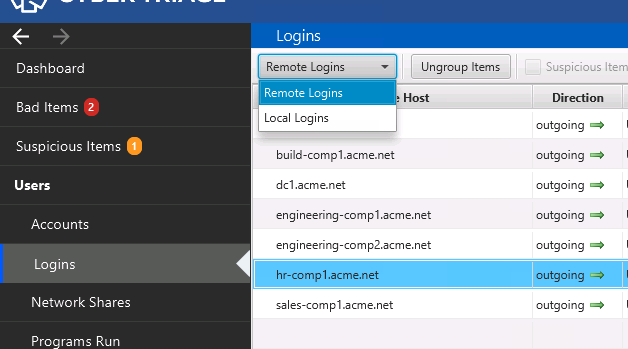
When you show remote logins, they will be grouped by the host so that you can focus on which are anomalous and unexpected.
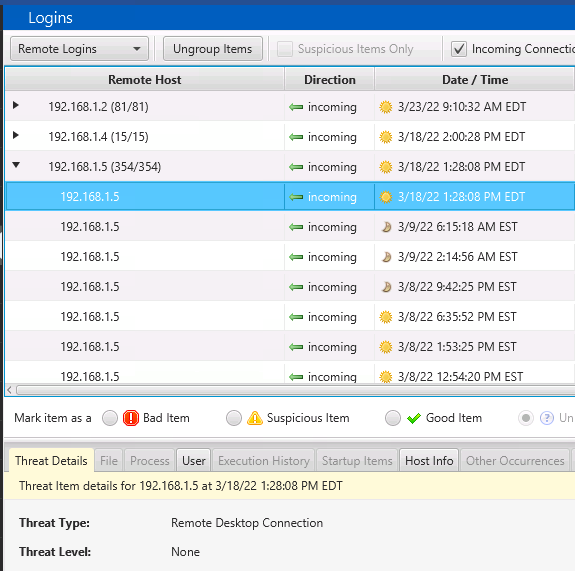
Or, you can choose the “Ungroup” button at the top and be able to see all logins sorted by time.

The paid version will mark logins as suspicious based on things like remote and local usernames and the timing of logins.
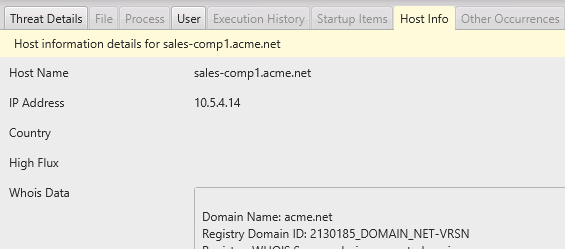
When you select a session, then you’ll get further details below, such as about the remote host and the user involved.
What Programs Did they Launch?
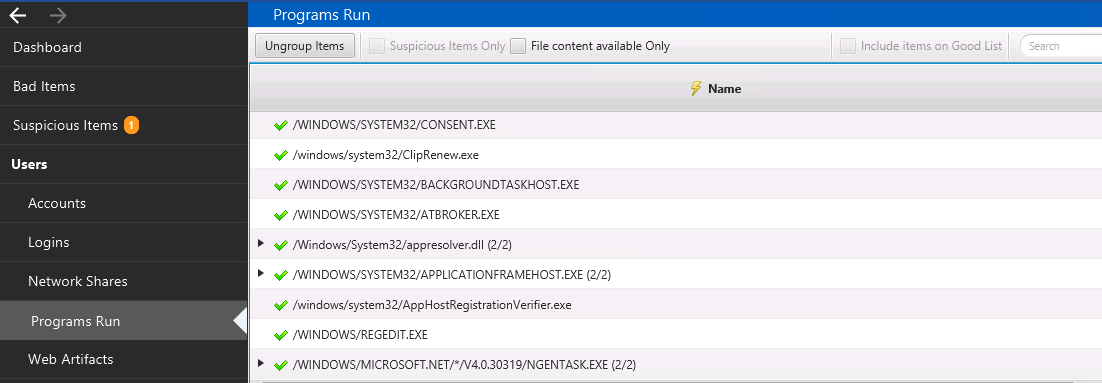
The “Programs Run” section will show you what programs were previously launched on the system.
The value of using Cyber Triage Lite for reviewing this data is that it merges many types of artifacts, such as prefetch and userassist, into a single view. And then, you can dive into the details of the unique program names if they are relevant.
You can learn more about investigating program-run events in Intro to DFIR – User Activity.
The programs are grouped by folder to make it easy to focus on anomaly folders.
You can right-click on an entry to export the EXE file contents for further analysis.
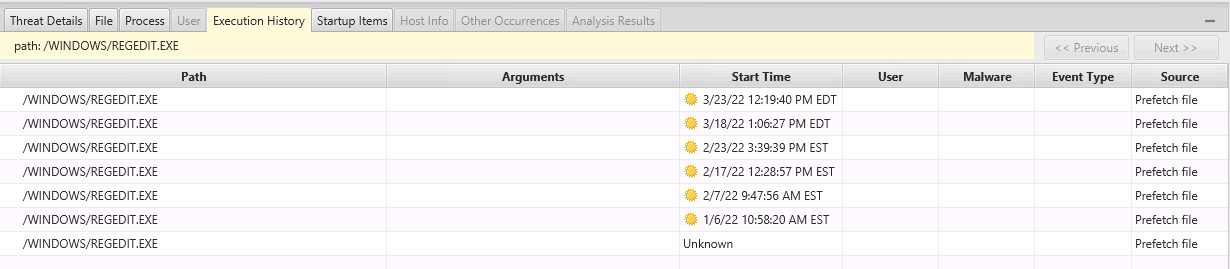
Select the “Execution History” tab on the bottom to see the specific dates that the program was run.
The Paid version will mark programs as suspicious based on their path and based on malware scan results.
What Websites Were Visited?
Websites can be relevant for downloading attack tools or phishing links. You can find that in Cyber Triage Lite under “Web Artifacts.”
This panel shows downloads, cookies, and history items from Chrome, Firefox, and Edge and groups them by domain.
The value of using Cyber Triage Lite for reviewing this data instead of manually reviewing is that you can quickly focus on downloaded files by domain to identify suspicious files.
Selecting the Web Artifacts tab will show you the grouped activity. By default, only the previous 2-months of activity is shown, but you can expand that with the pull-down. You can also filter on certain types of activity.
NOTE: Cyber Triage 3.1 has a bug that does not expand web artifacts in Lite mode. It is fixed in the 3.2 release coming April 1.
Any of the items can be manually scored as Bad or Suspicious and added to the final report.
Conclusion
Cyber Triage Lite gives you much more than just a pile of text files to review. It displays the data in a grouped fashion and allows you to filter on them and see related details.
You can download Cyber Triage Lite from here if you want to try it out.